IMC Compliance - Walkthrough
This article is Part 2 in a 7-Part Series.
- Part 1 - IMC Compliance - Overview
- Part 2 - This Article
- Part 3 - IMC Compliance - Scheduling Tasks
- Part 4 - IMC Compliance - Advanced Policies
- Part 5 - IMC Compliance - Recovery Commands
- Part 6 - IMC Compliance - Display Commands
- Part 7 - IMC Compliance - Testing Rules
The best way to understand how IMC Compliance Center works is to walk through a simple example. We’re going to start with a simple goal: We want to check that all our Cisco devices include “no ip source-route” in their configuration. Once you see how to work through a basic compliance check, you can start to build up complex policies.
Pre-Defined Policies and Rules
We’re going to create our own custom Policy, and add our own custom rules to it, but first we’ll take a look at the pre-defined Policies and Rules. IMC includes a number of pre-defined policies, covering NSA routing security guidelines, PCI-DSS requirements, STP configuration, etc. These pre-defined rules are useful both as a starting point for your own policies, and to better understand how the syntax works. We can’t modify pre-defined rules, but we’re free to copy them into our own policies, and then tweak them as needed. Go to Service -> Compliance Center -> Compliance Policy to take a look at the list:
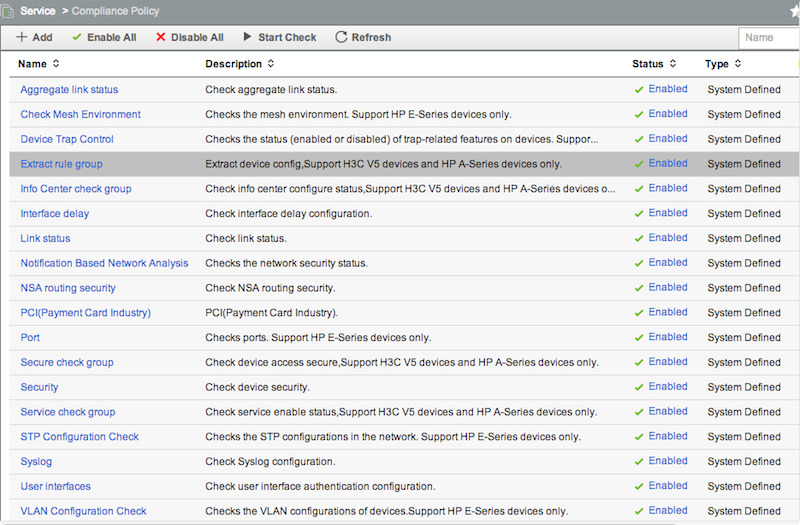
Note that all policies are currently Enabled. I highly recommend going through and clicking “Enabled” next to each policy - this will change it to Disabled. The reason for this is that every time you schedule a compliance check, IMC will default to selecting all Enabled policies. You then have to go through and de-select them each time. Trust me, this gets really tedious after the 15th time of de-selecting 12 policies. Better to disable them here, and only leave your custom policies enabled. Let’s take a look at what some of the pre-defined policies contain. Click “NSA routing security”:
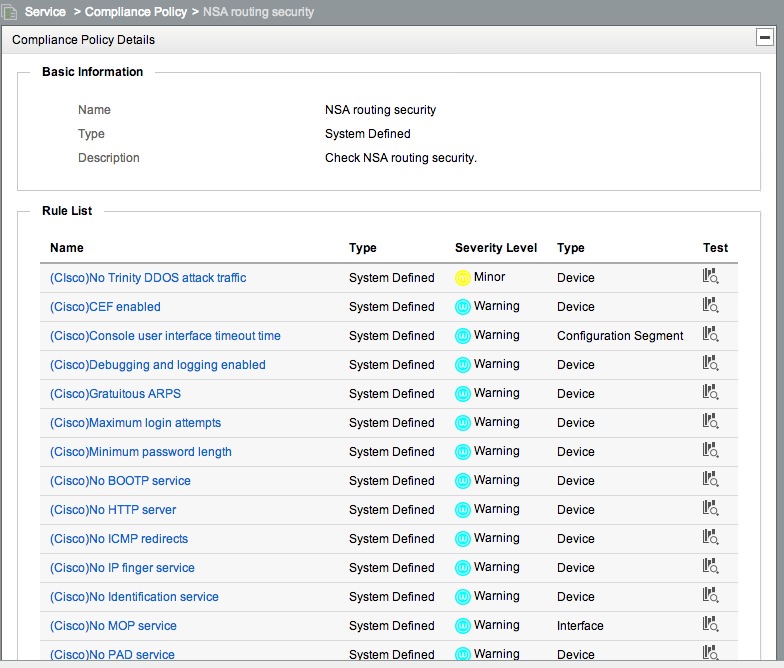
We can see that this has a list of individual rules, each of which checks a specific configuration. You can also see that the names contain Cisco, H3C or HPA. Since configurations vary between vendors, Rules can be applied to specific vendors or device series. Adding the Vendor to the Rule name can make it easy to see this at a glance. Click on “(Cisco)No HTTP server”:
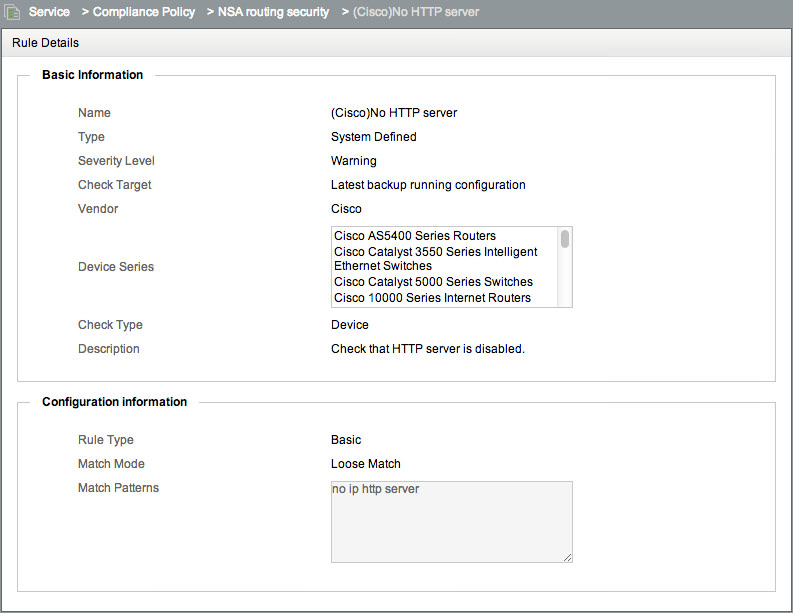
Things to note here: First the Severity - this is set to Warning. You can choose your own Severity when creating rules. These are arbitrary. If you wish, you can run Compliance Checks that only check rules above a specific level. I think you should just fix all problems, but I guess sometimes you need to prioritise. Next note that the Vendor is set to Cisco, and there are many Cisco device types selected here. If you run this rule against a non-Cisco device, it will skip it, without creating an error. This lets you apply a mixed group of rules to a mixed group of devices, and not get weird results because the Cisco rules don’t align with Comware configuration.
There’s also an optional rule Description, and further down the actual rule, which checks for the presence of no ip http server in the configuration. You can reverse this check - e.g. you might want to alarm if that pattern IS present.
Adding Our Own Custom Policy
For our example here, we’re going to create our group of rules - aka a Policy. Go to Service -> Compliance Center -> Compliance Policy, and click Add:
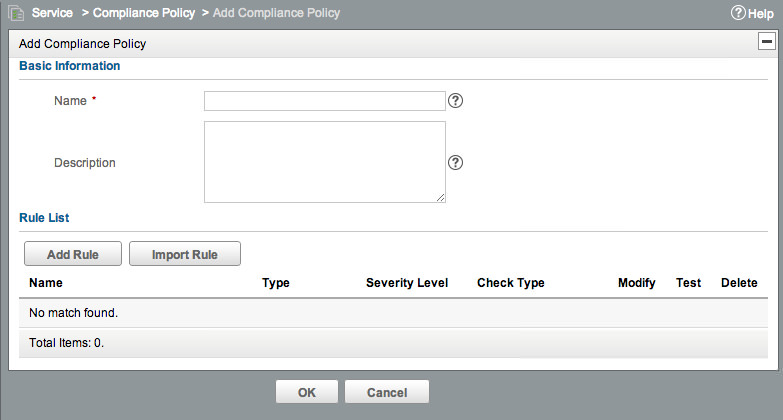
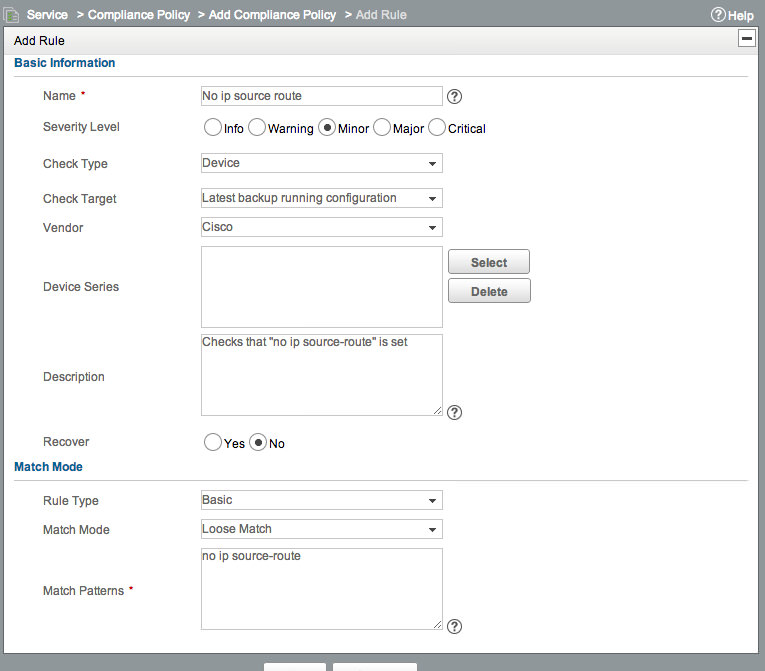
Give it a name and description. Then we’re going to add a rule. Note that you can import a rule - this will let you select one or more rules from the list of all currently defined rules. This will copy the rule, so it can be modified independently. We want to Add a new rule. Click Add. Give the rule a Name, pick a Severity, and set the Vendor to Cisco. In the “Match Patterns” section, enter no ip source-route. Leave all other values at default. The new rule should look like this:
Click OK, then click OK again. Now go to Service -> Compliance Center -> Check Task, and click Add:
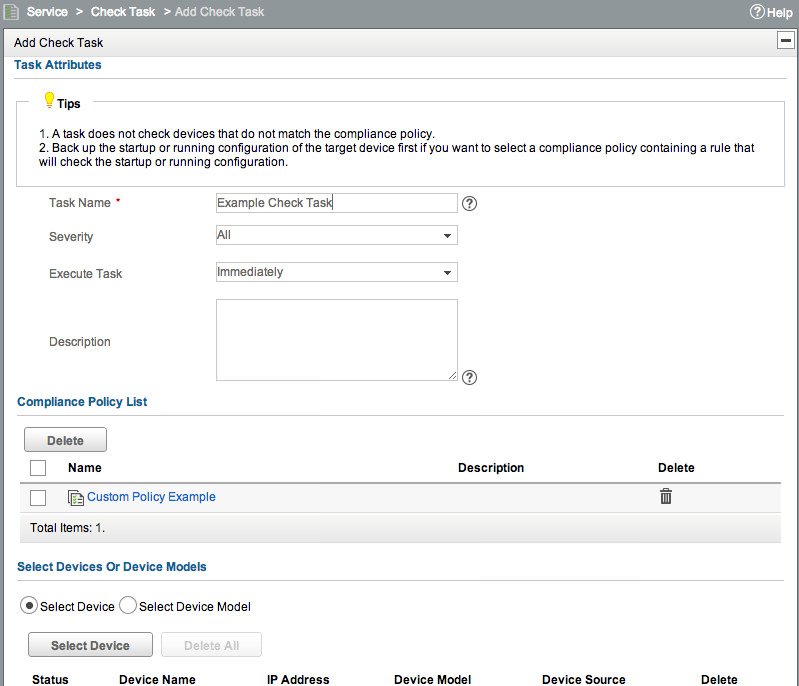
If you didn’t disable the other Policies, you’d need to go and Delete them from here. Note that this does NOT delete the policy, it just removes it from this specific check. The policy is unaffected. You can select either a list of devices, or Device Models that you want to run this check against. We’re going to select a couple of Cisco 2970s in my lab. Select those, then click OK, and our check will run immediately. Note that you may not see a result straight away - it will take a few seconds. Initially the results list will look like this:

Click Refresh, and you should see the results. Note that the “Check Results” column will show the highest severity failure. If you hover over the Results, it will tell you how many failures there were at each severity level.

Click on the Results, and you’ll get a Pop-up showing a deeper breakdown of the checked devices, and the results:
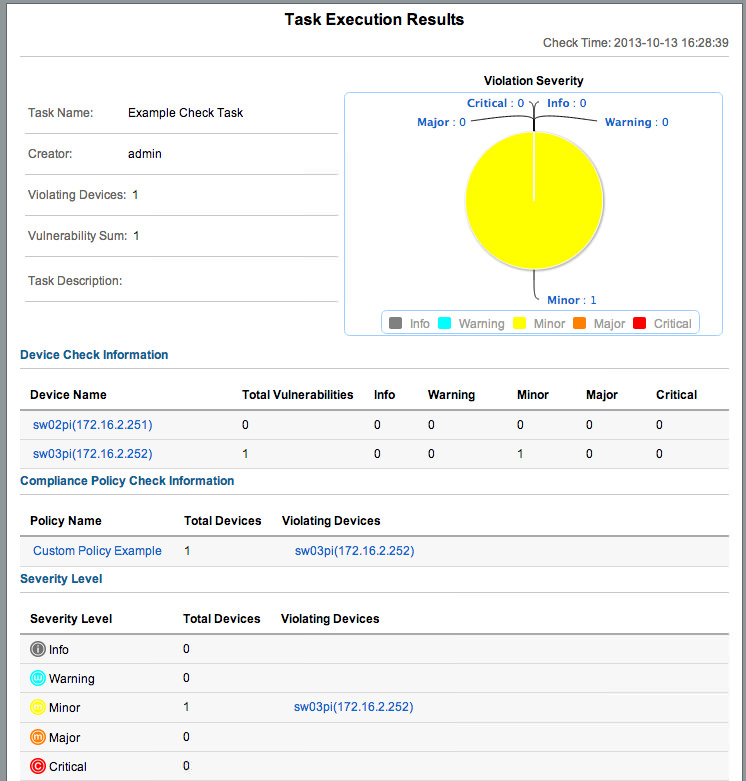
We can see that one device passed, and one had 1 Minor failure. Click on the failed device, and we can see exactly what failed:
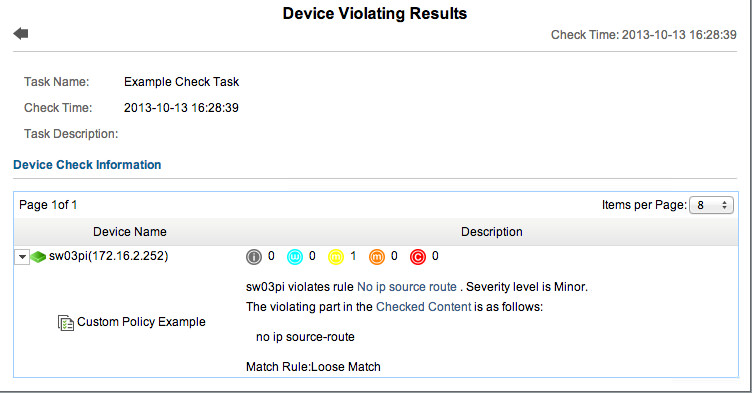
You can see exactly what rule failed, the content the rule was run against, and the specific item that failed. If you have complex policies, this can be extremely helpful in figuring out what exactly needs to be fixed. Note that the rule name “No ip source route” is a hyperlink to the rule definition, while “Checked Content” is a hyperlink to the configuration that was checked. Easy!
Now you can start building up your Compliance policies, adding rules to ensure that all systems comply with your base templates and security policies. In future posts, we’ll look at Scheduling, and more complex rules.