New Juniper Rack Mount Kit
Juniper has a new enhanced four-post rack mount kit “JNP-4PST-RMK-1U-E” for their 1RU datacenter devices. It works with devices like the QFX5120 and PTX10001-36MR. It is much improved over the legacy rack mount kit. It are not as good as some competitors, but it is backwards compatible. It makes switch installation quicker and safer.
Background: Current 4-post rail kit
Juniper has used the same 4-post kit for their 1RU datacenter switches and routers for many years. The same kit works on QFX5100, QFX5110 and QFX5120-48Y switches. The MX204 uses a slight variation, but is almost identical. Oddly, the QFX5120-32C uses something completely different. Devices are secured to the front and rear posts. 2-post mounting is unwise for modern deep devices with heavy PSUs. You can still get away with 2-post mounting for lighter, shallower access switches. Modern servers and deep switches/routers need 4-post mounting, or some sort of shelf.
The current kit “EX-4PST-RMK” has 2 parts per side:
One piece screws in to each side of the switch. Note that there are 8 holes per side, but Juniper supplies a total of 12 very small screws. As you can imagine, installing 12 very small screws per switch is no fun when you have a stack of 50. The other pieces of the rail kit mounts from the rear, to connect the switch to the rear posts.
The switch installs from the front, and screwed into…oh. Wait. Yes, you will need to install 8 cage nuts first (not supplied). Make your blood sacrifice to the networking gods.
Having installed the cage nuts, now you can supply your own screws, and screw in the front…no…wait. What’s going to hold this heavy switch up while the screws are going in? The documentation says you need two people for this step. But we all know that installation doesn’t work that way.
Can we pre-mount the rear rails, then slide the switch in, so it’s supported from the rear while we screw in the front? No chance. The rear rails are flimsy pieces of metal that wilt when you take them out of the box. Any slight bend and they bind up when sliding into the front rails. There’s no safe way to lift a switch in by yourself, slide it onto the rear rails, then screw in the front.
Your choices are: find a helper, install a temporary server below the switch, or: Patchbox setup.exe:
This acts as another pair of hands. Now we can screw in the front, then install the rails at the rear. Note how easy they flex. Force them in, screw in to the rack, go back and tighten the front screws, and remove the setup.exe.
This kit works, but it is dangerous for one person, and it wastes time and money. Juniper uses the same kit for the new PTX10001-36MR, a very dense 1RU router with 3kW PSUs. Even better, for the PTX10001-36MR, 4 of the little screws are different to the others. No guidance on which ones to use where. Those are very small screws and very flimsy rails for a system that weighs 18kg.
The Industry and the Competition
If you’ve spent your career installing network gear, you might assume “that’s the way it is.” Or it’s a challenge, see who can do the difficult task as quickly as possible. Or you take any suggested improvement as some sort of challenge to your engineering chops. Check this NANOG thread. Yes, I know, be very careful reading NANOG. A few quotes:
A 30-minute time to install a regular 1U ToR switch seems a bit excessive. Maybe the very first time a tech installs any specific model switch with a unique rail configuration. After that one, it should be around 10 minutes for most situations.
I’m an idiot for being so slow:
30 minutes to pull a switch from the box stick ears on it and mount it in the rack seems like a realllllly long time. I think at tops that portion it that’s a 5-10 minute job if I unbox it at my desk
Can someone explain to me how to install 8 x cage nuts, 12 x small screws, mount the device, and install the 8 x cage nut screws in 10 minutes? I’m sorry, I’m calling bullshit. Someone else claims to be even faster:
it usually takes about 3 minutes
And somehow, the tool-less kits are slower and more difficult? Why has no-one told the server engineers this?
Those speed rails as well are a bit of a challenge to install
I’m sorry what? No they are not. Not even close to a challenge to install compared to typical network vendor rails. I can install and remove Dell server rails from the front of the rack without even needing walk around the back. They are explicitly designed to be quick and easy to work with, not “as cheap as possible.”
Other comments were along the lines of “considering overall lifetime TCO, it’s not a deal-breaker.” That I can understand. It’s not going to be the sole factor deciding on vendor X over Y. Some folks said they only rack a few switches once a year. Yes, for you, it doesn’t matter. For those of us doing this more than a few times, it does matter. “My switches run 15 years with no hardware replacements.” Some of have let go of CatOS. There was no network hardware on the market 15 years ago that meets my needs today.
I can install an entire 384lb 21U core router in 30 minutes.
Yeah, well, good for you pal. My father walked uphill both ways to school, and on the day it snowed he still had to go to school. But here’s the thing: it doesn’t need to be that way. Just because you had to live with something doesn’t mean the rest of us have to. It doesn’t have to involve installing tiny fiddly screws and delicate balancing acts. There’s no reason other than stubbornness to resist improvement.
Server vendors solved this problem years ago. Dell, HPE, Lenovo have all had 4-post rail kits that work well for years. Yes, they’ve gone through iterations, and yes, they all have little tricks you need to learn to operate them. Yes I have caused a ball bearing explosion in DC11. But they are solid, and much quicker and safer than what network vendors do.
The key difference is that the rails are first installed into the rack, front and rear. They have clips and square lugs to fit into the posts, no cage nuts or screws needed. The server then slides into the rails. Quick, no tools needed.
Not all networking vendors have ignored progress. Arista rail kits work the same as server rail kits. Clip one piece to the side of the switch, install the rails into the rack, clip in, then slide the switch in. They also have adapters for 2-post rail kits. So it can be done. Dell does something similar.
Juniper’s New Rack Mount Kit
I have been telling Juniper this is a problem for years. Other customers too. Juniper has listened, and developed a new rack mount kit “JNP-4PST-RMK-1U-E.” No public documentation yet, but it is on the pricelist and orderable.
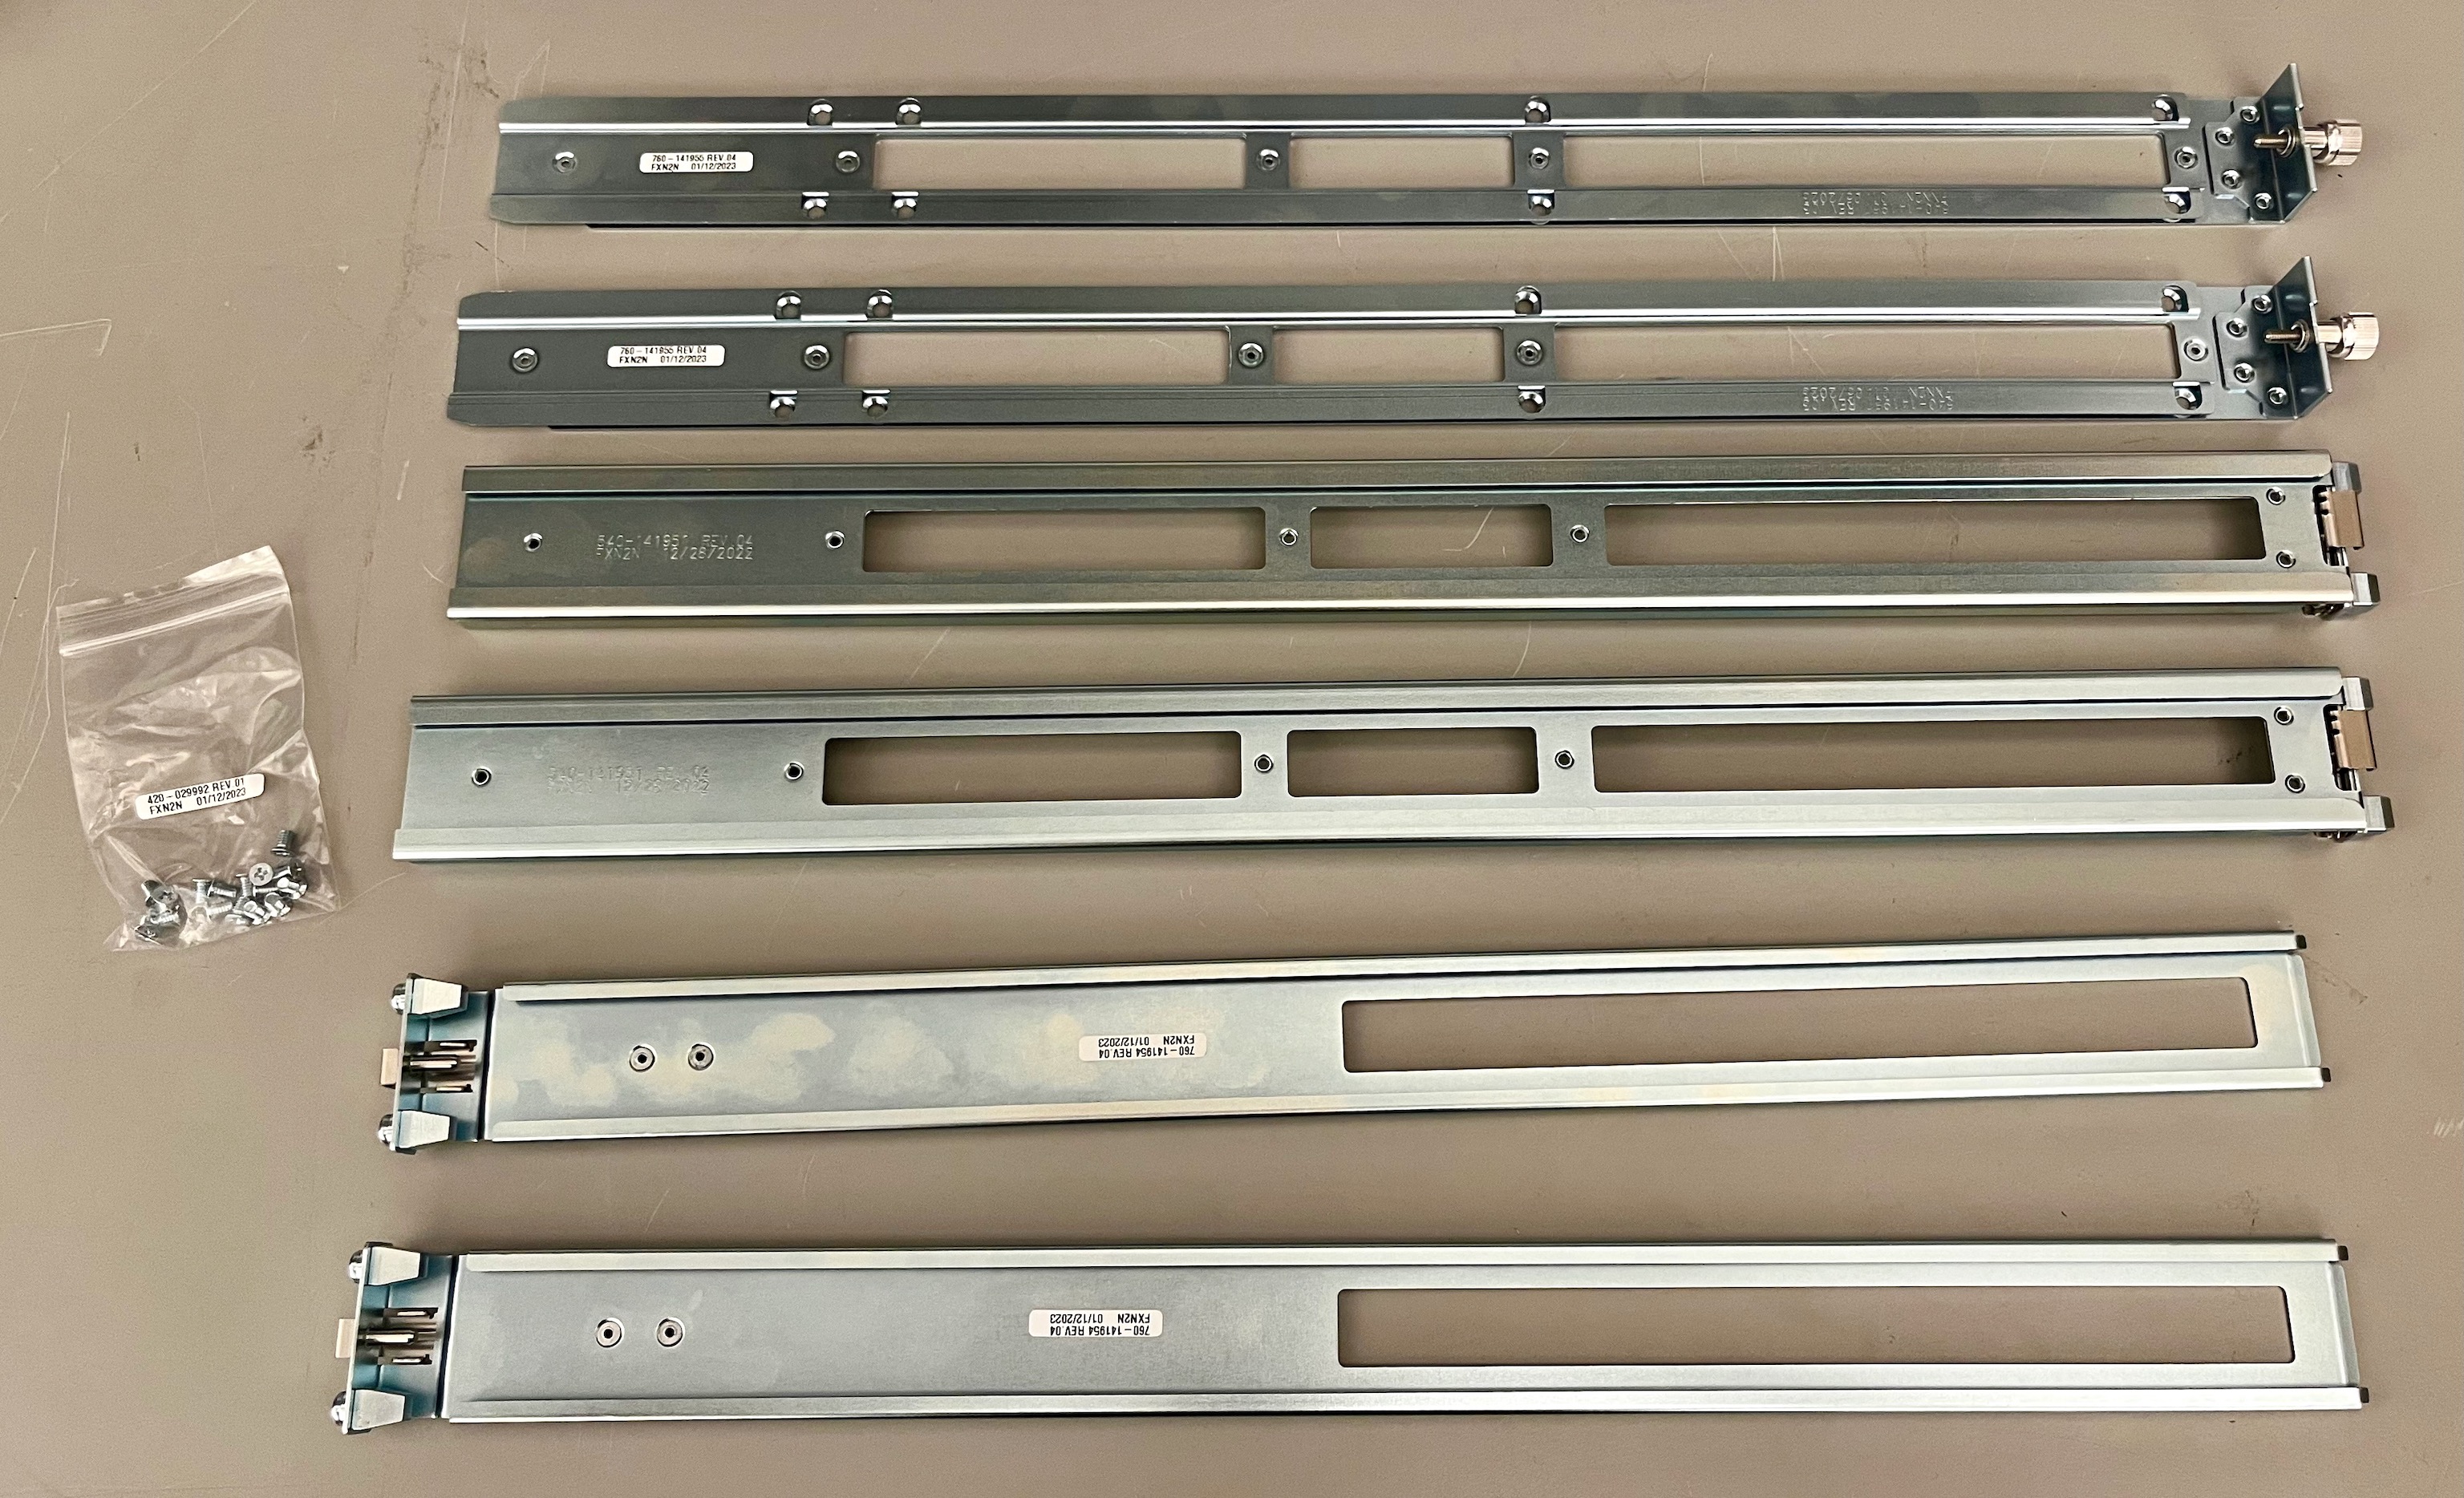
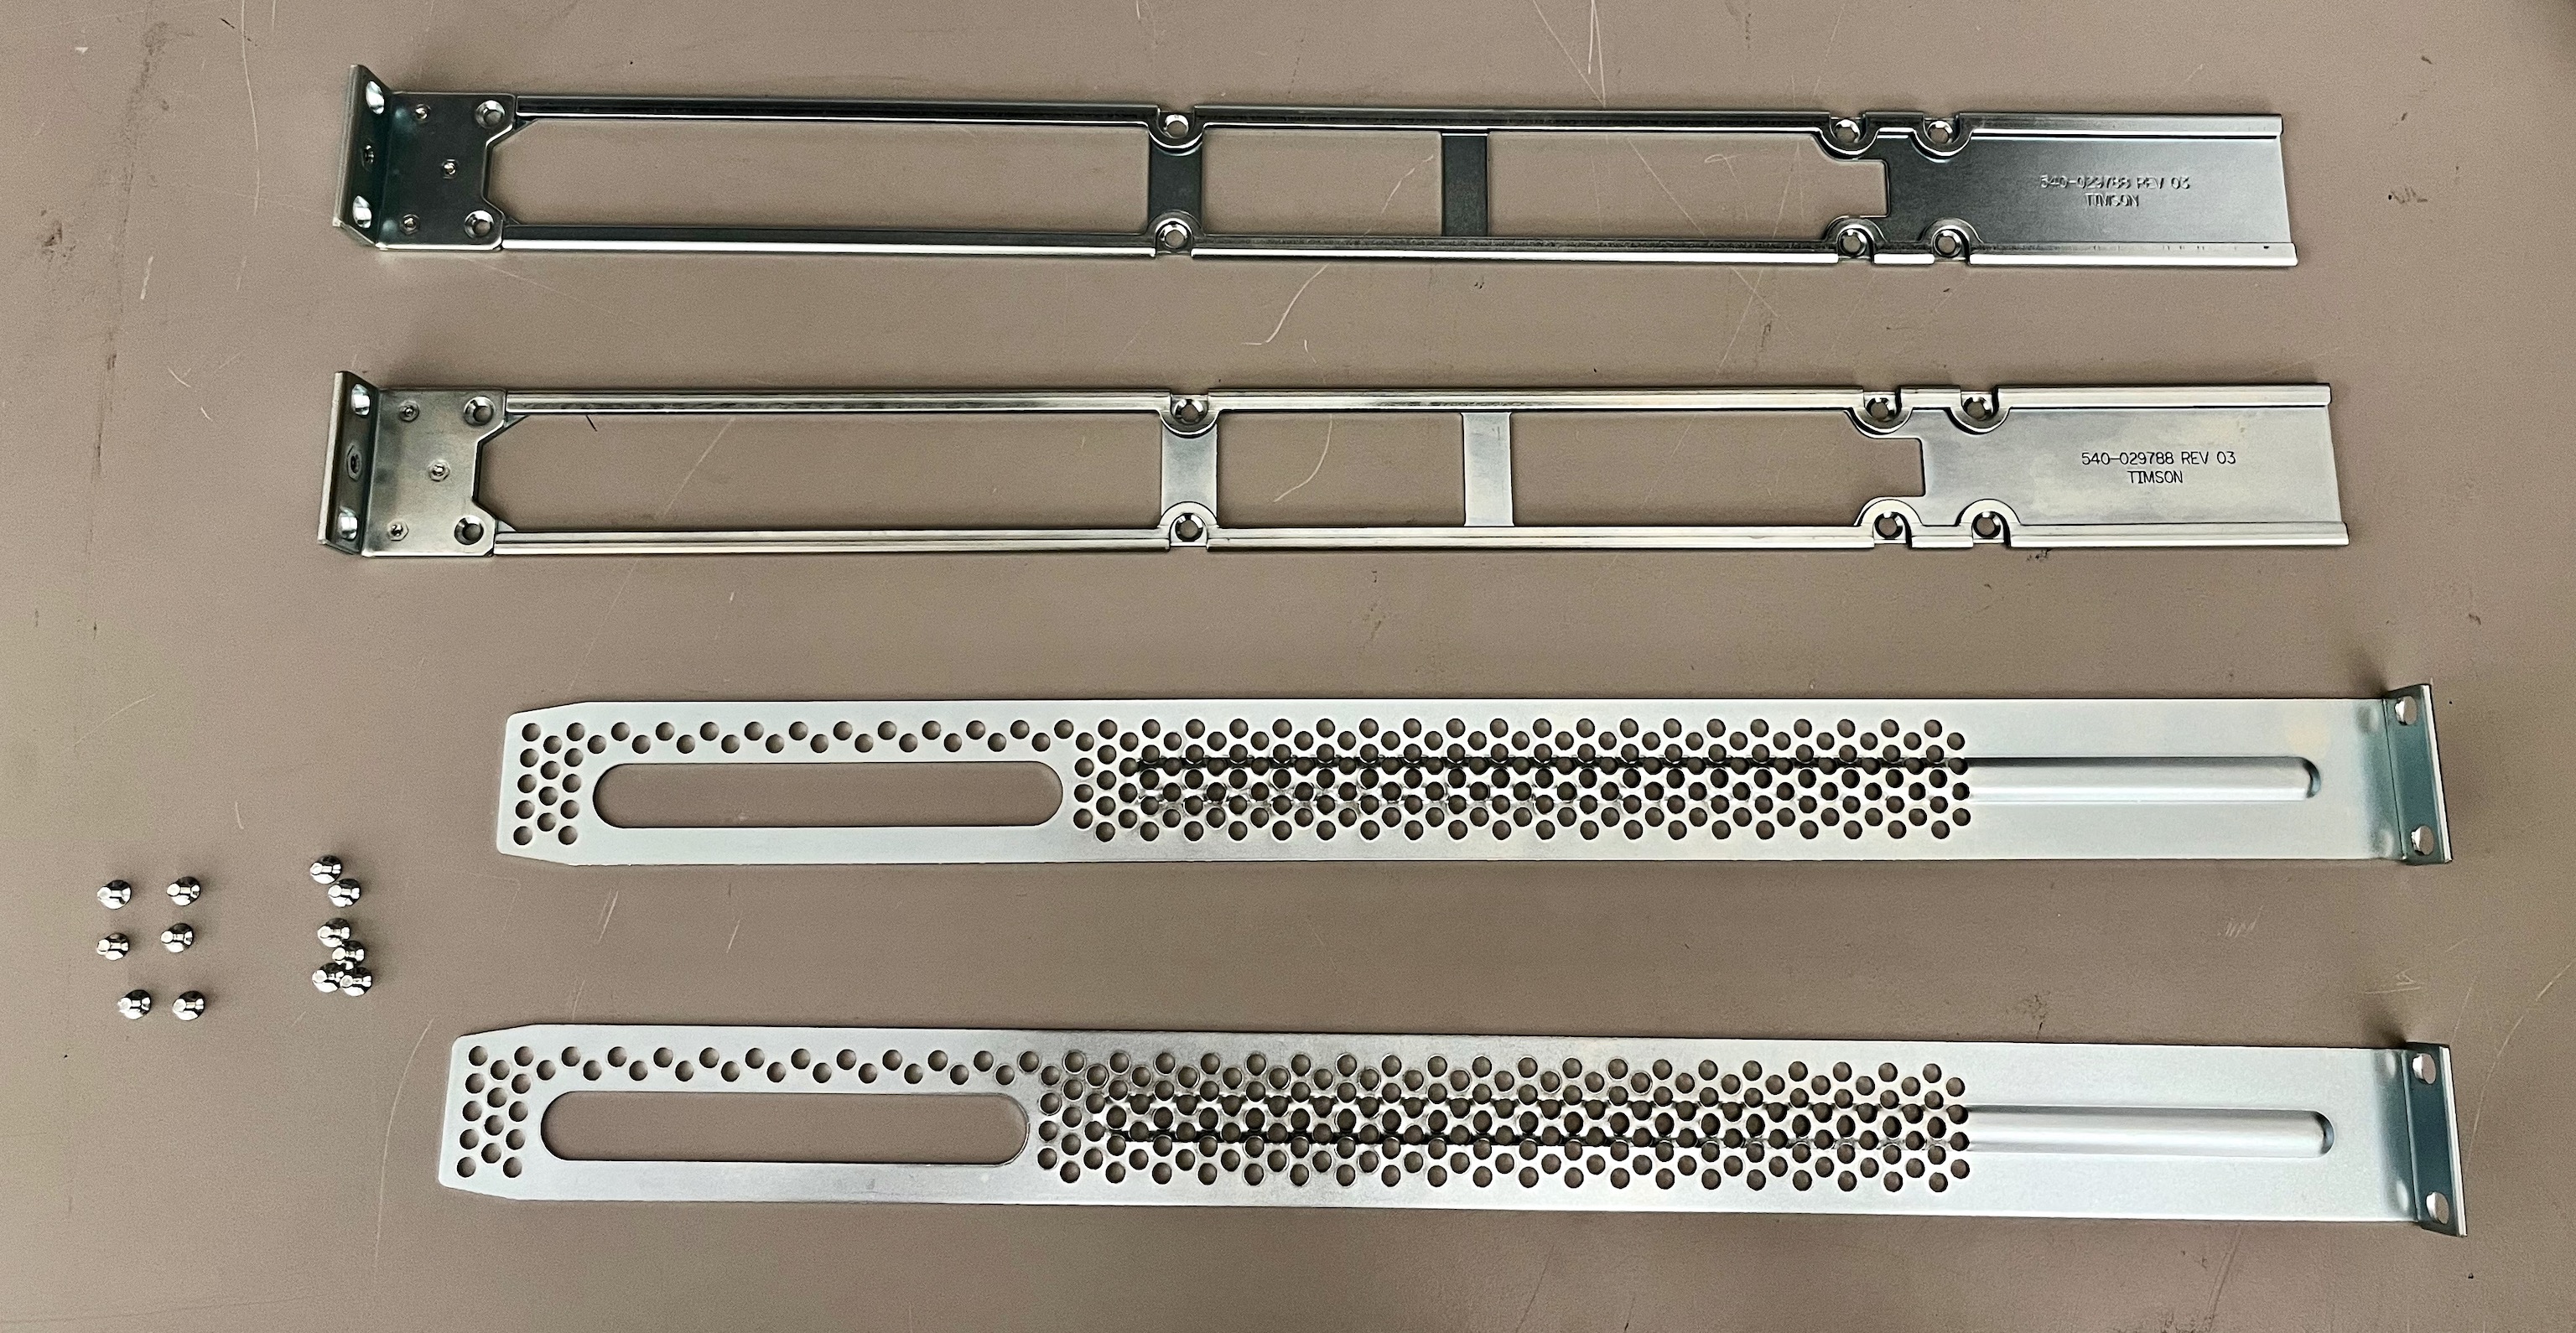
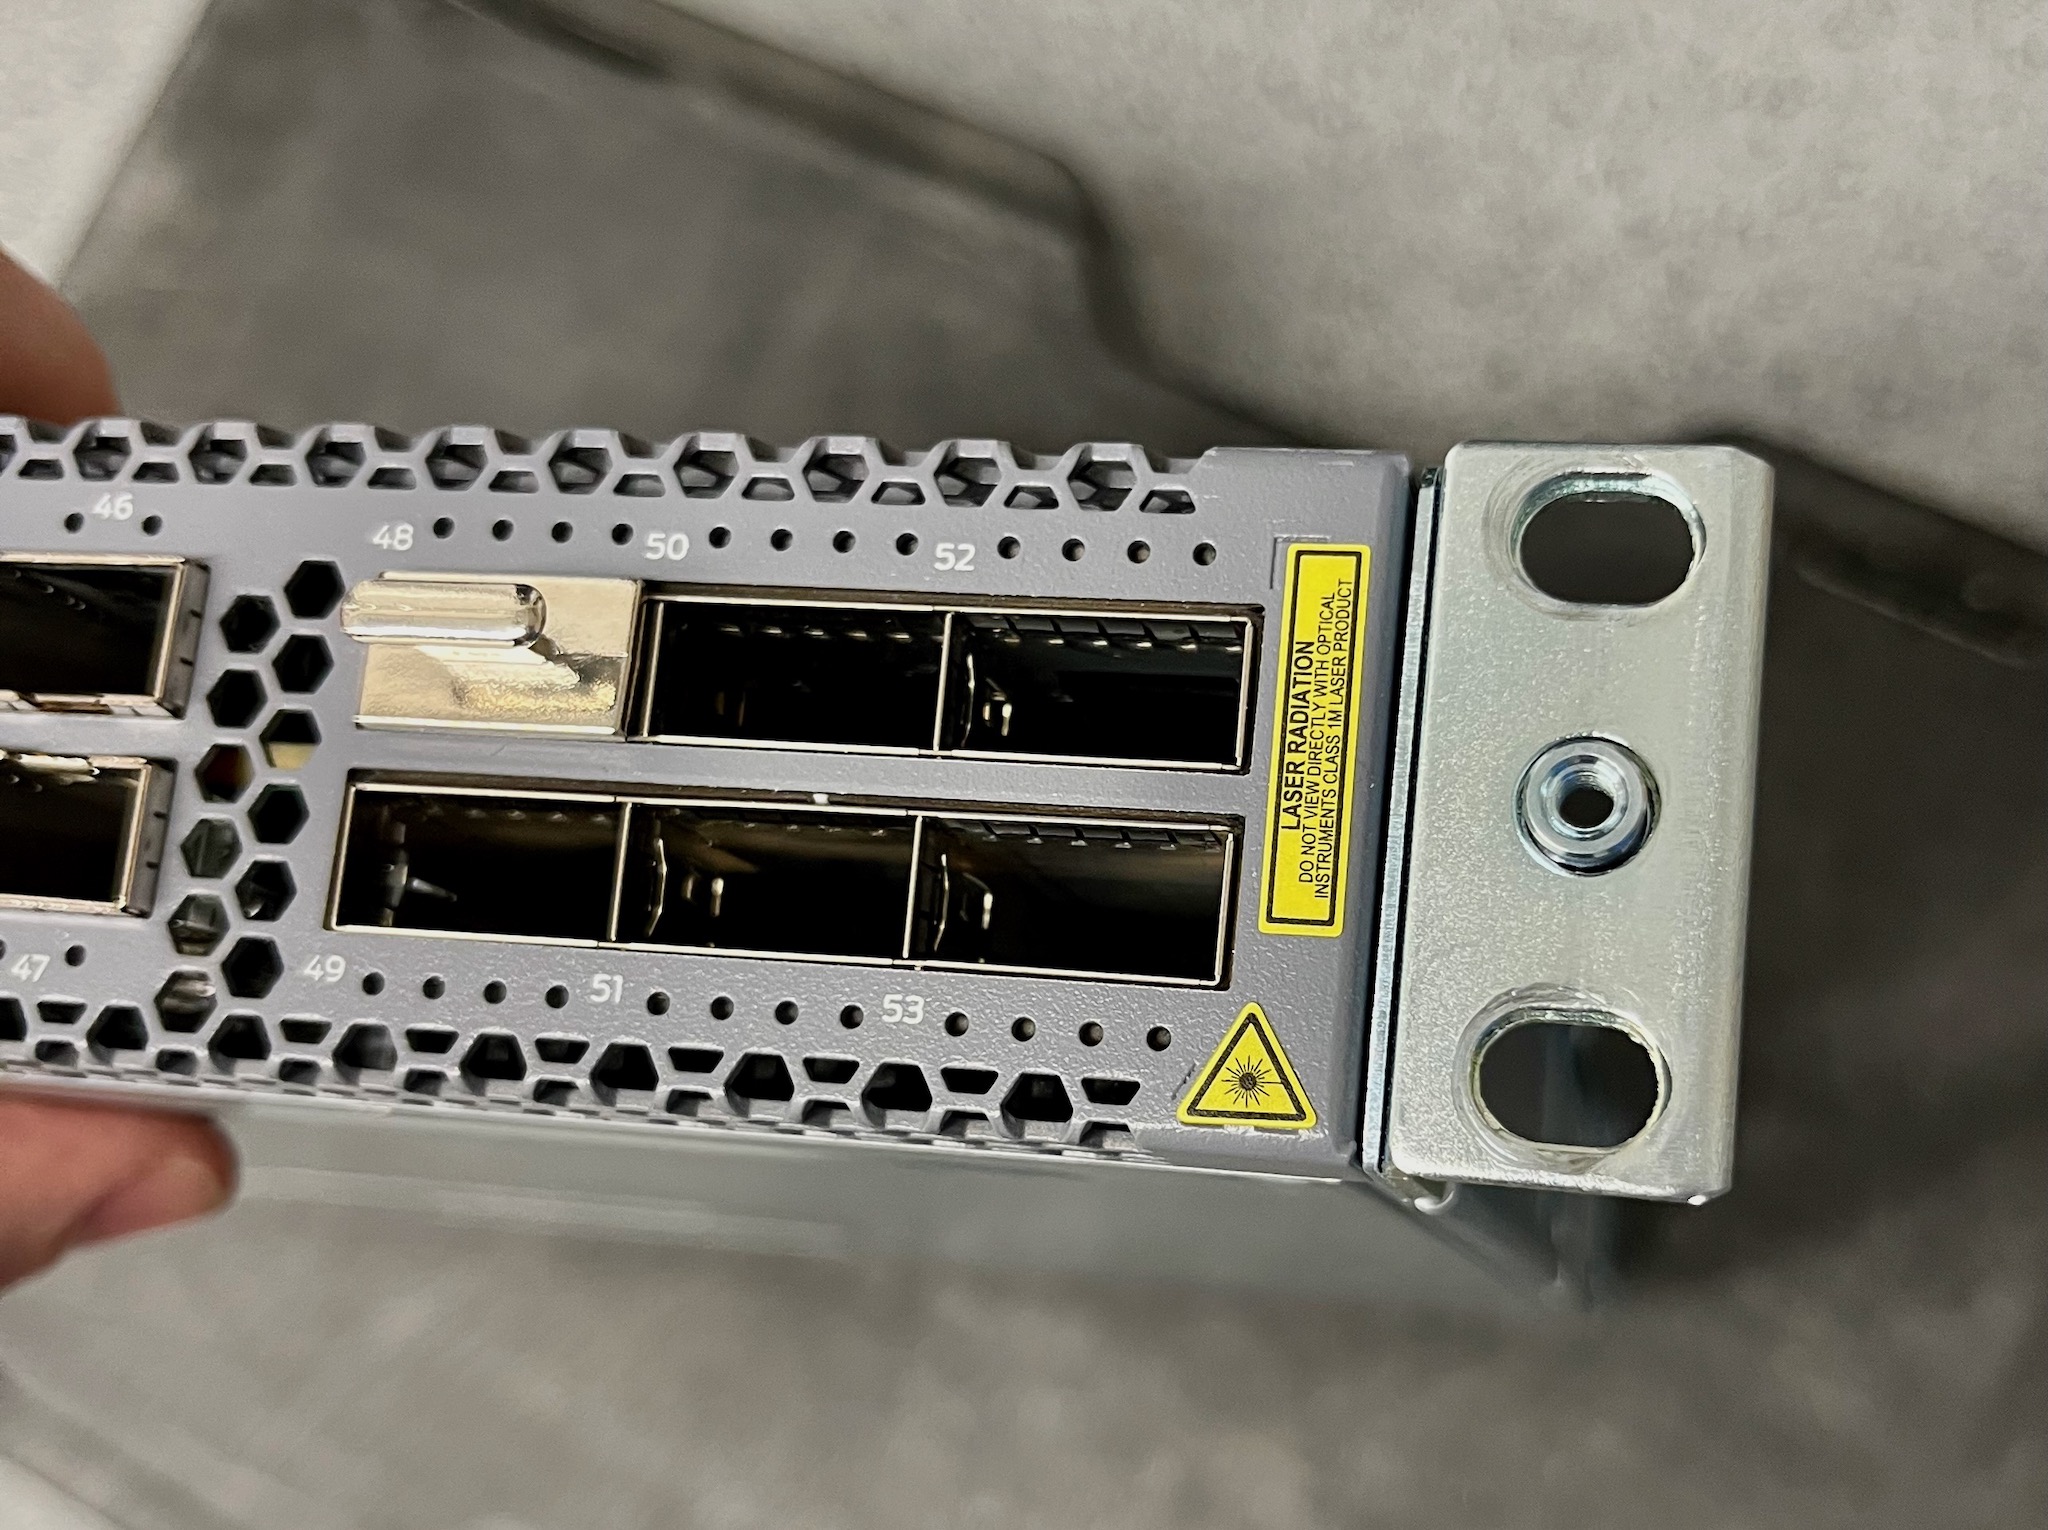
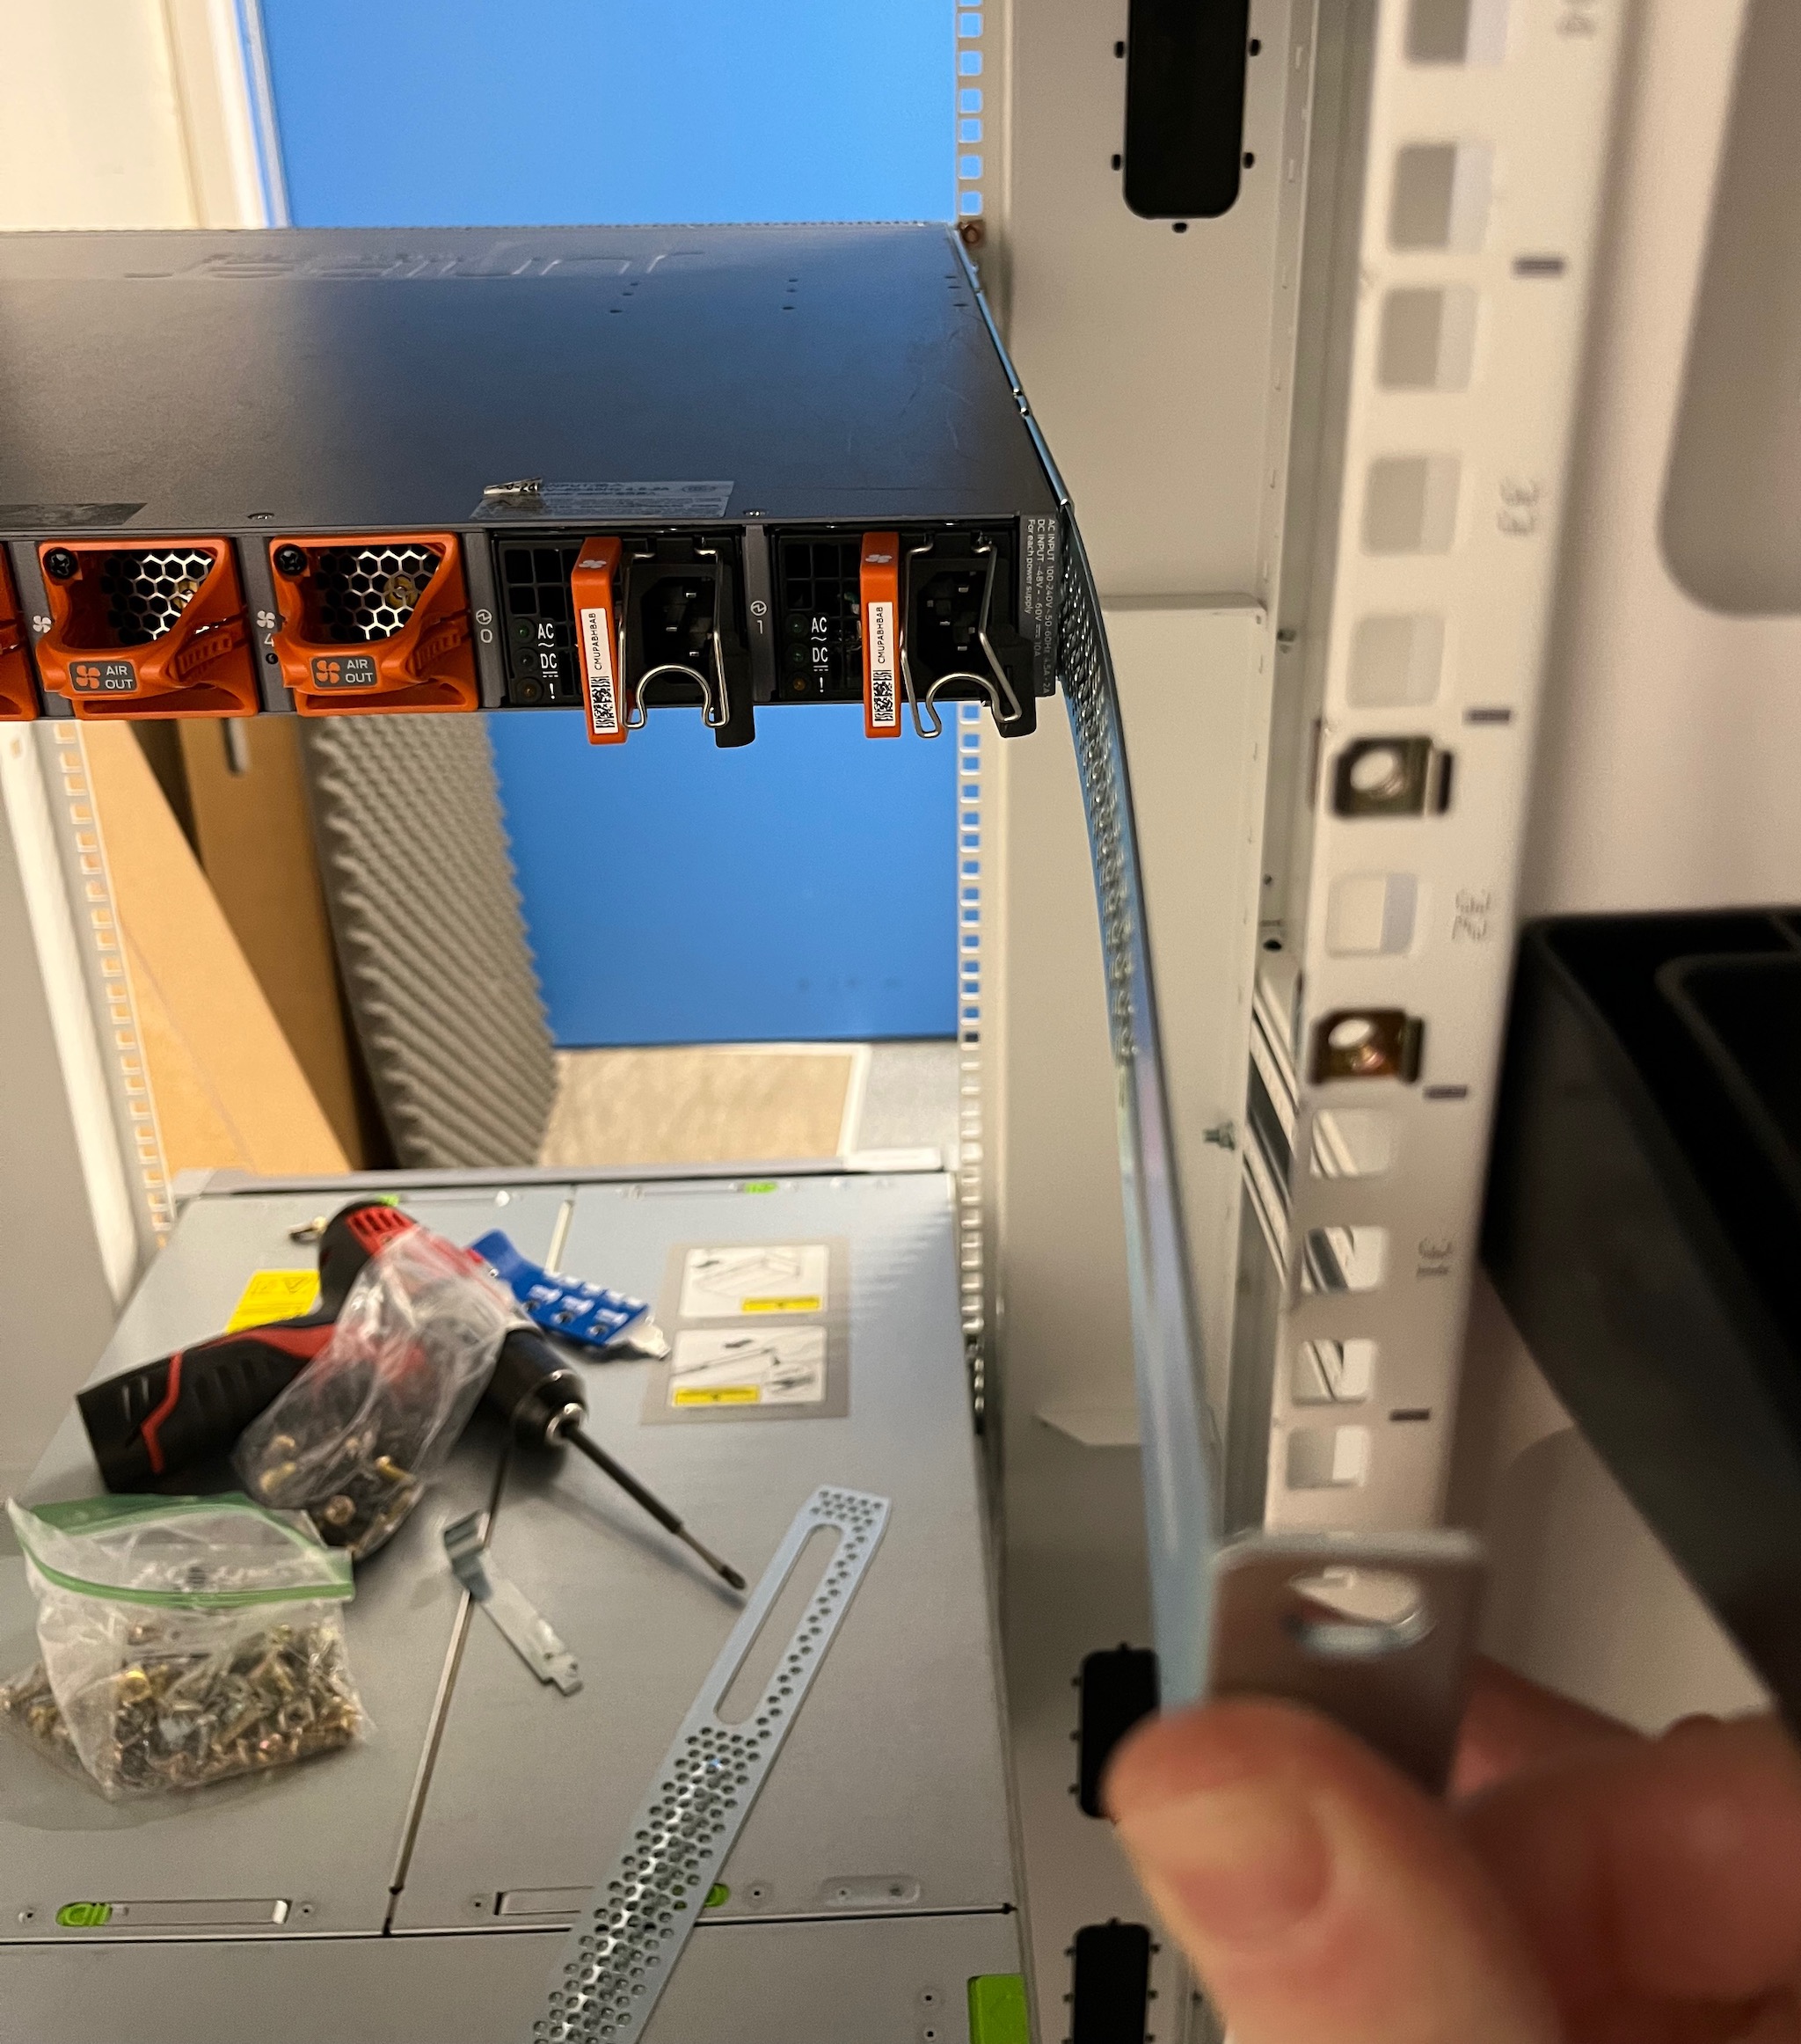
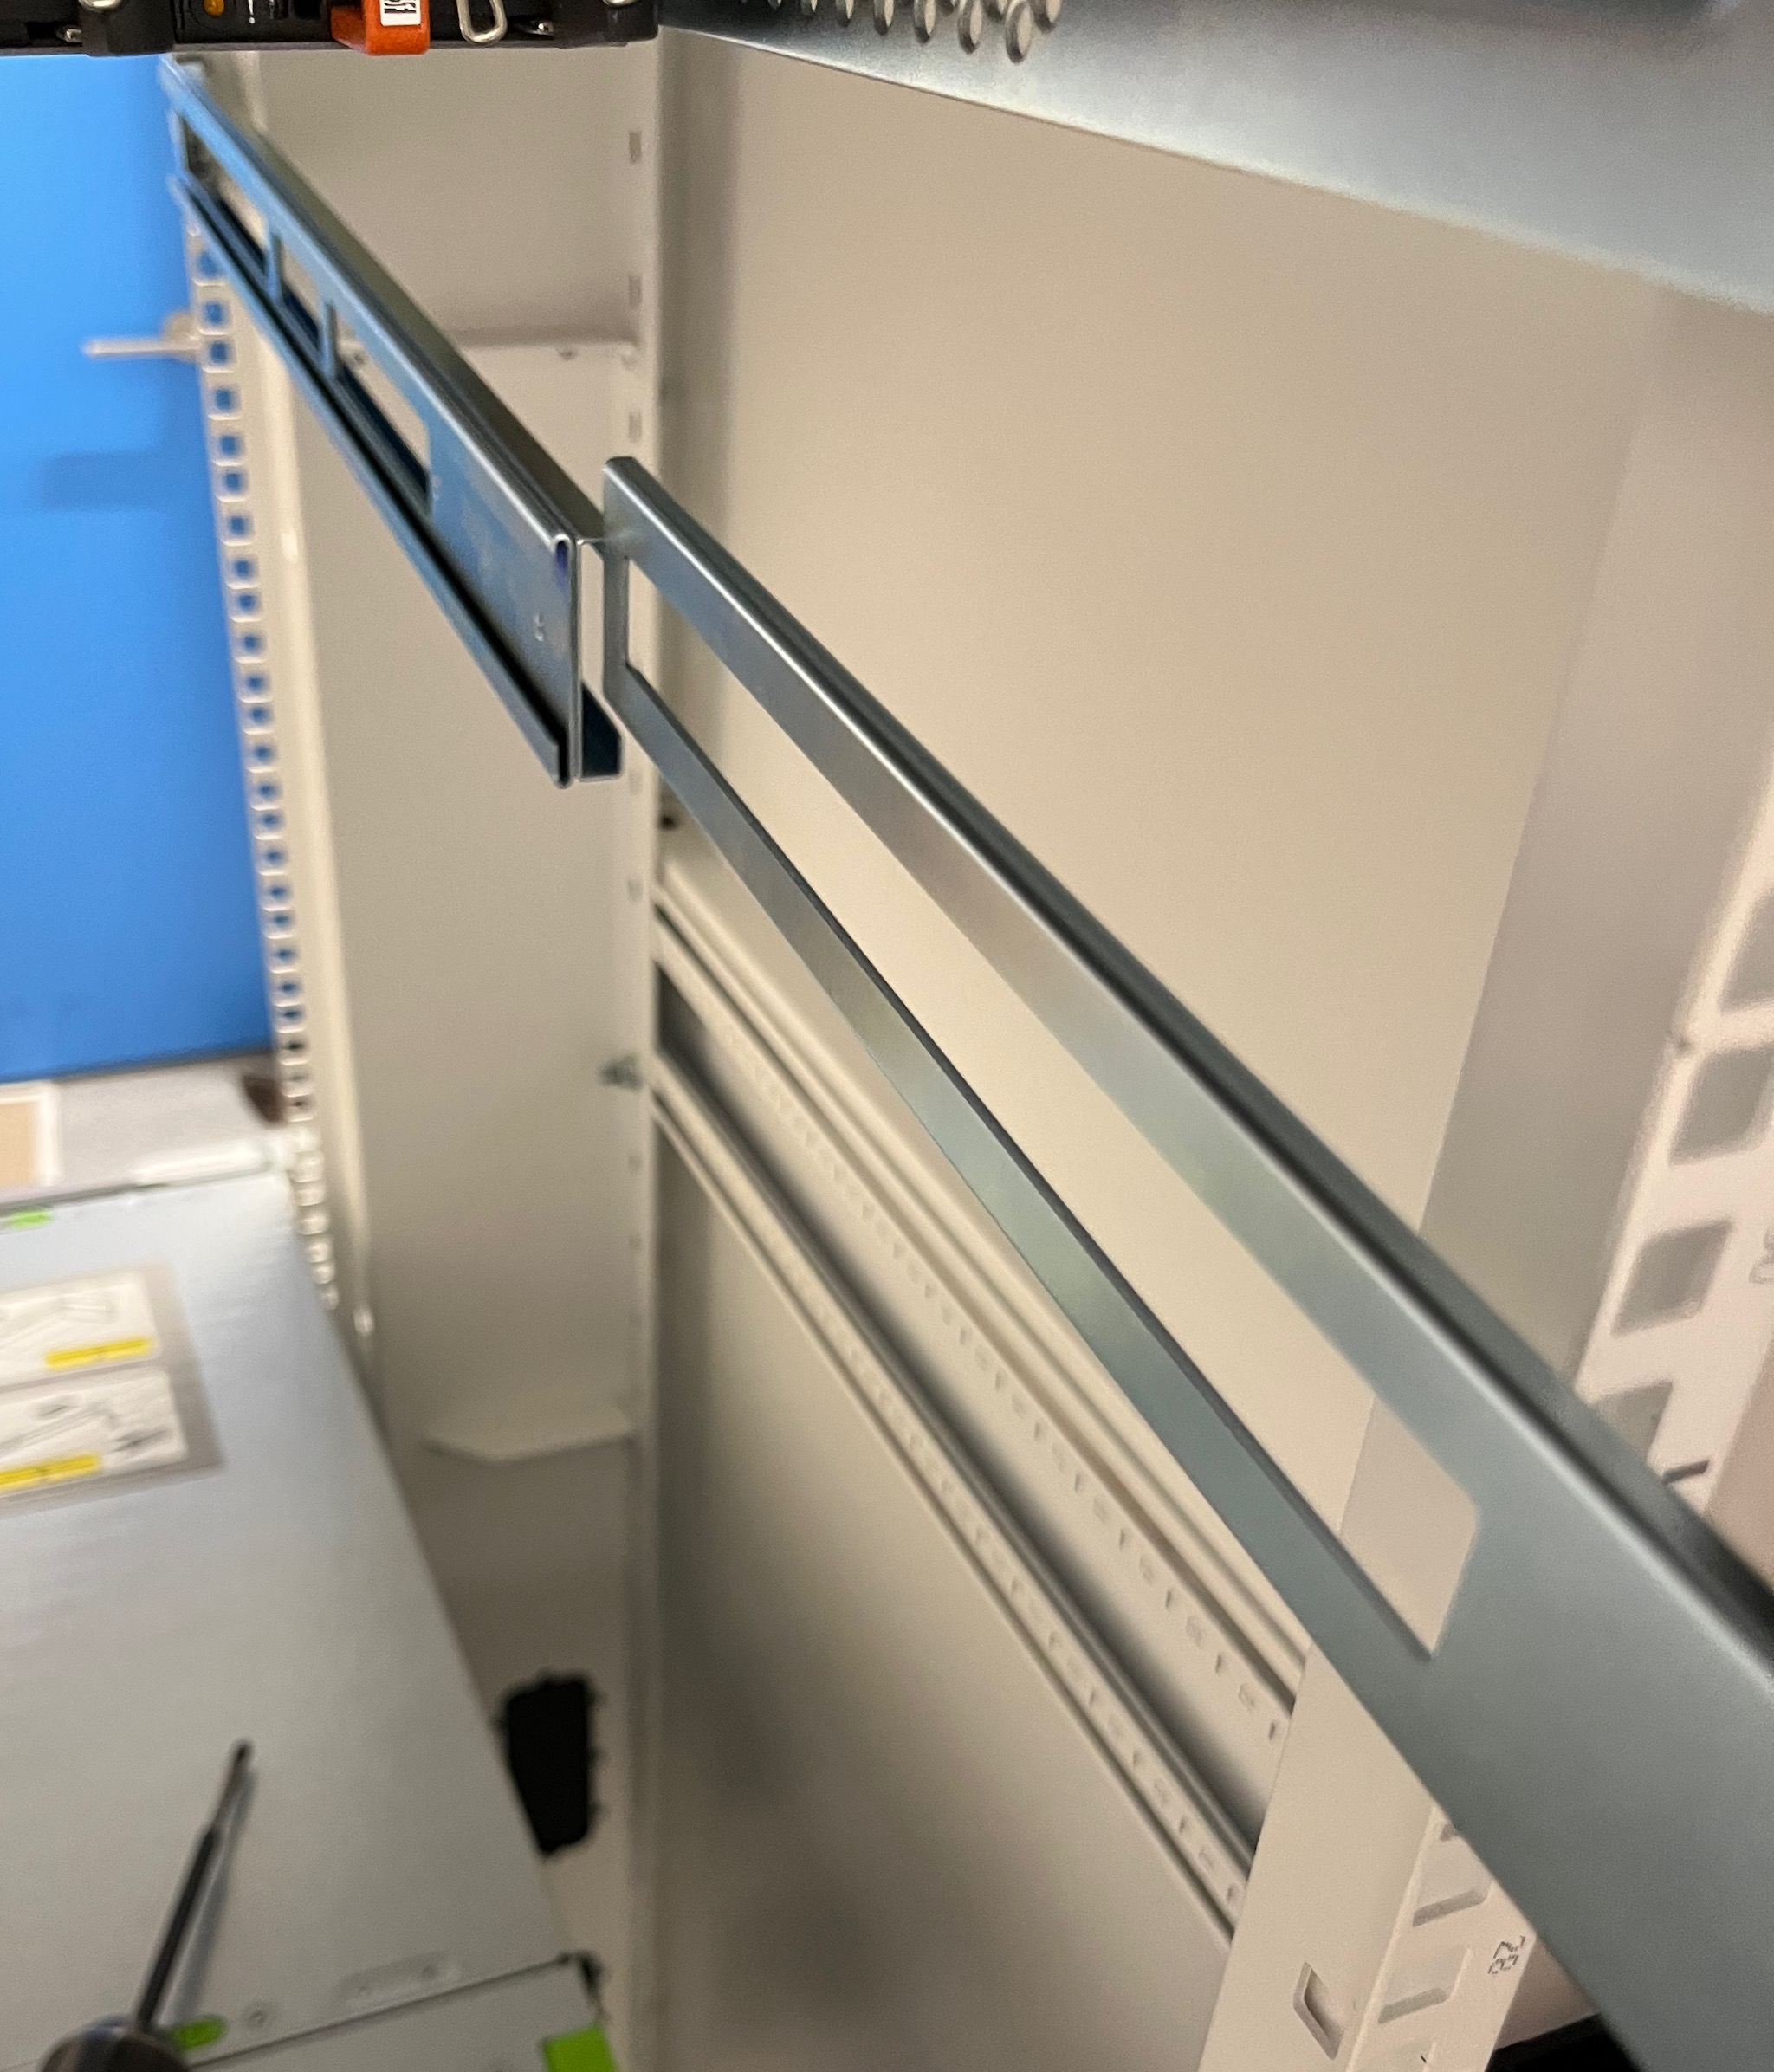
The first thing you’ll notice is there are 3 metal pieces per side. One piece screws onto the switch. Yes, you do still need to use some tools. The mounting points are the same as the old rails, so you can use this on all the same hardware that the old kit works on. The small bag there contains 16 screws! Install them all, or keep some for spares, leave a couple empty, for old time’s sake.
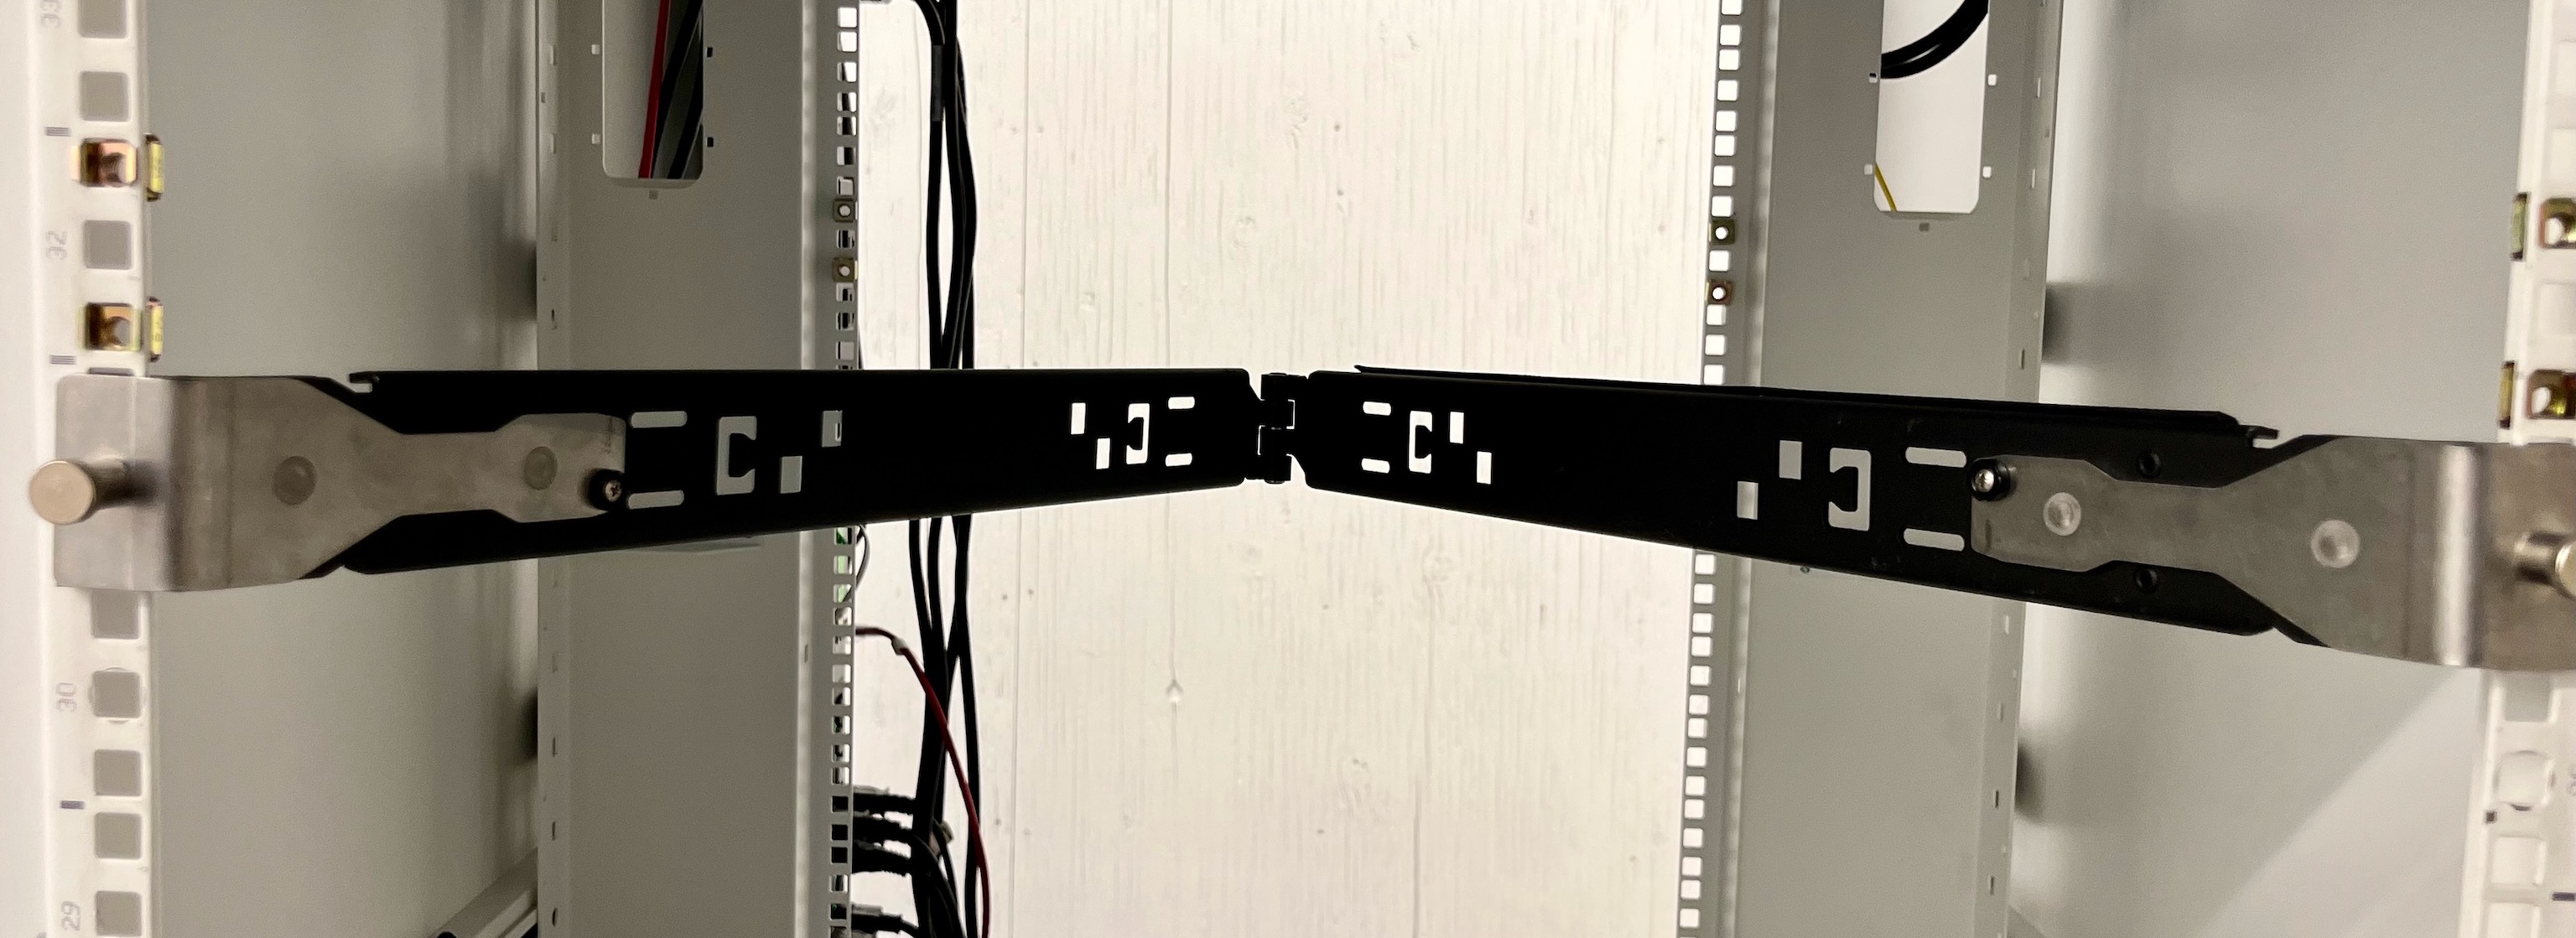
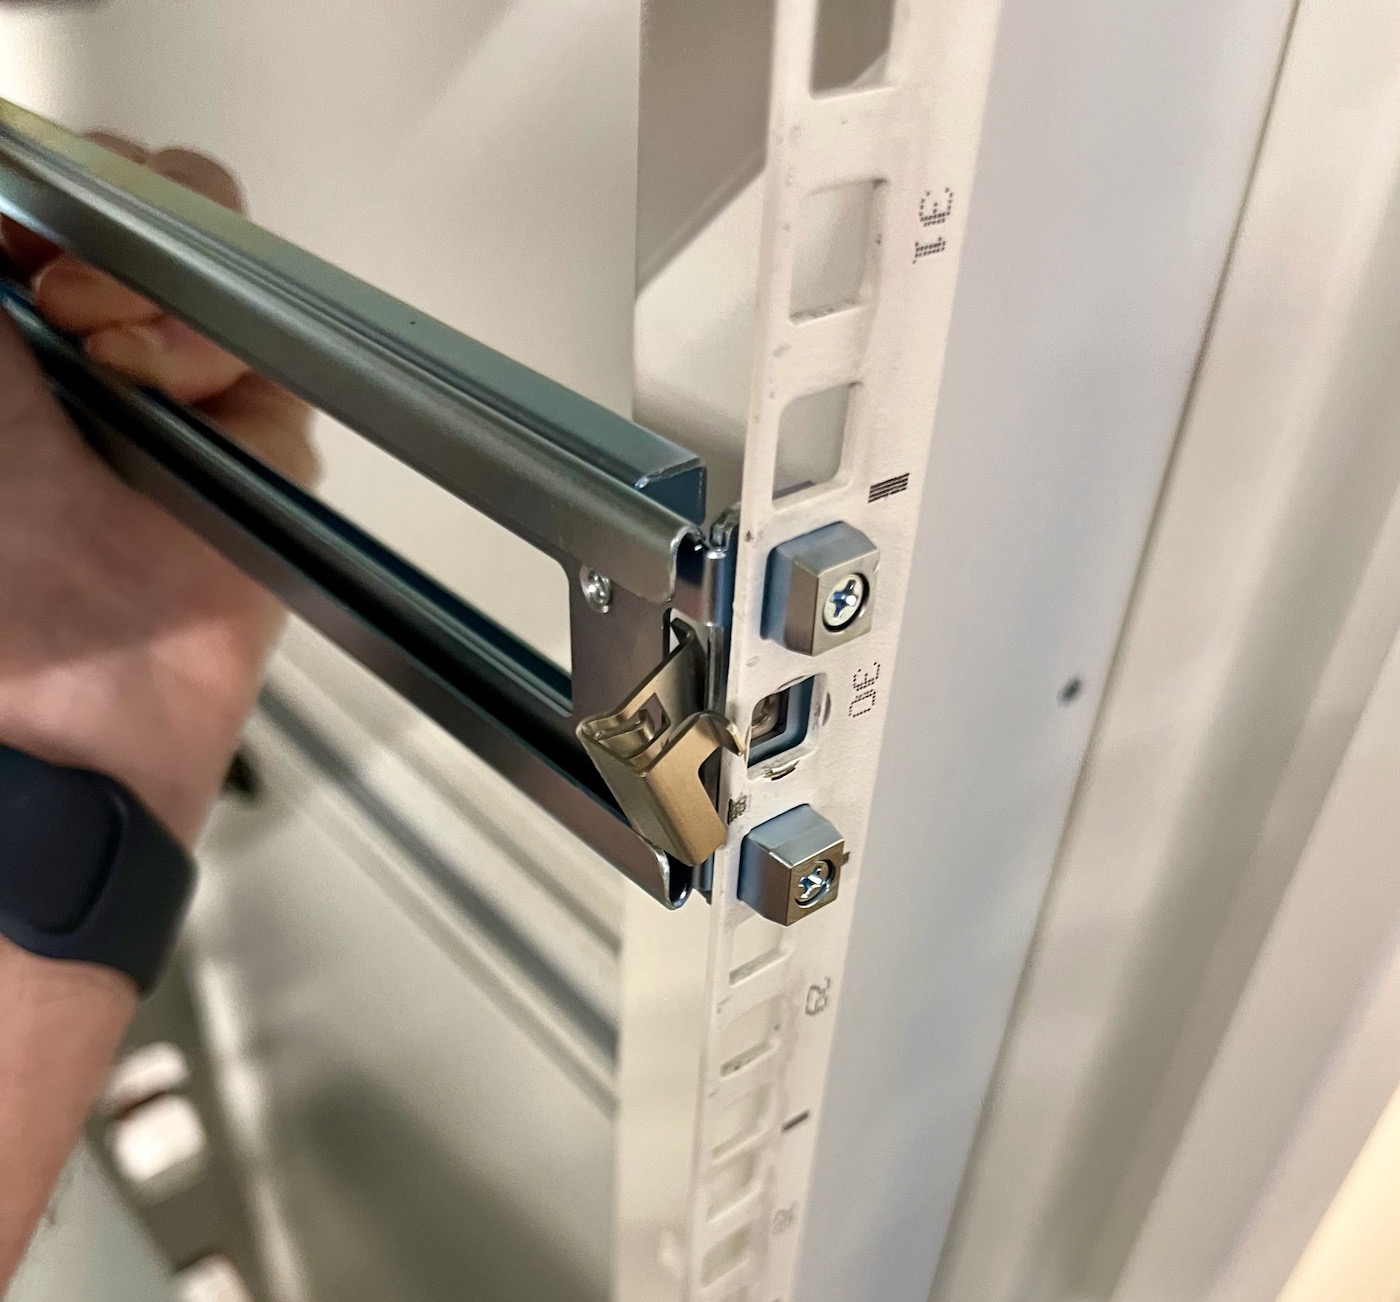
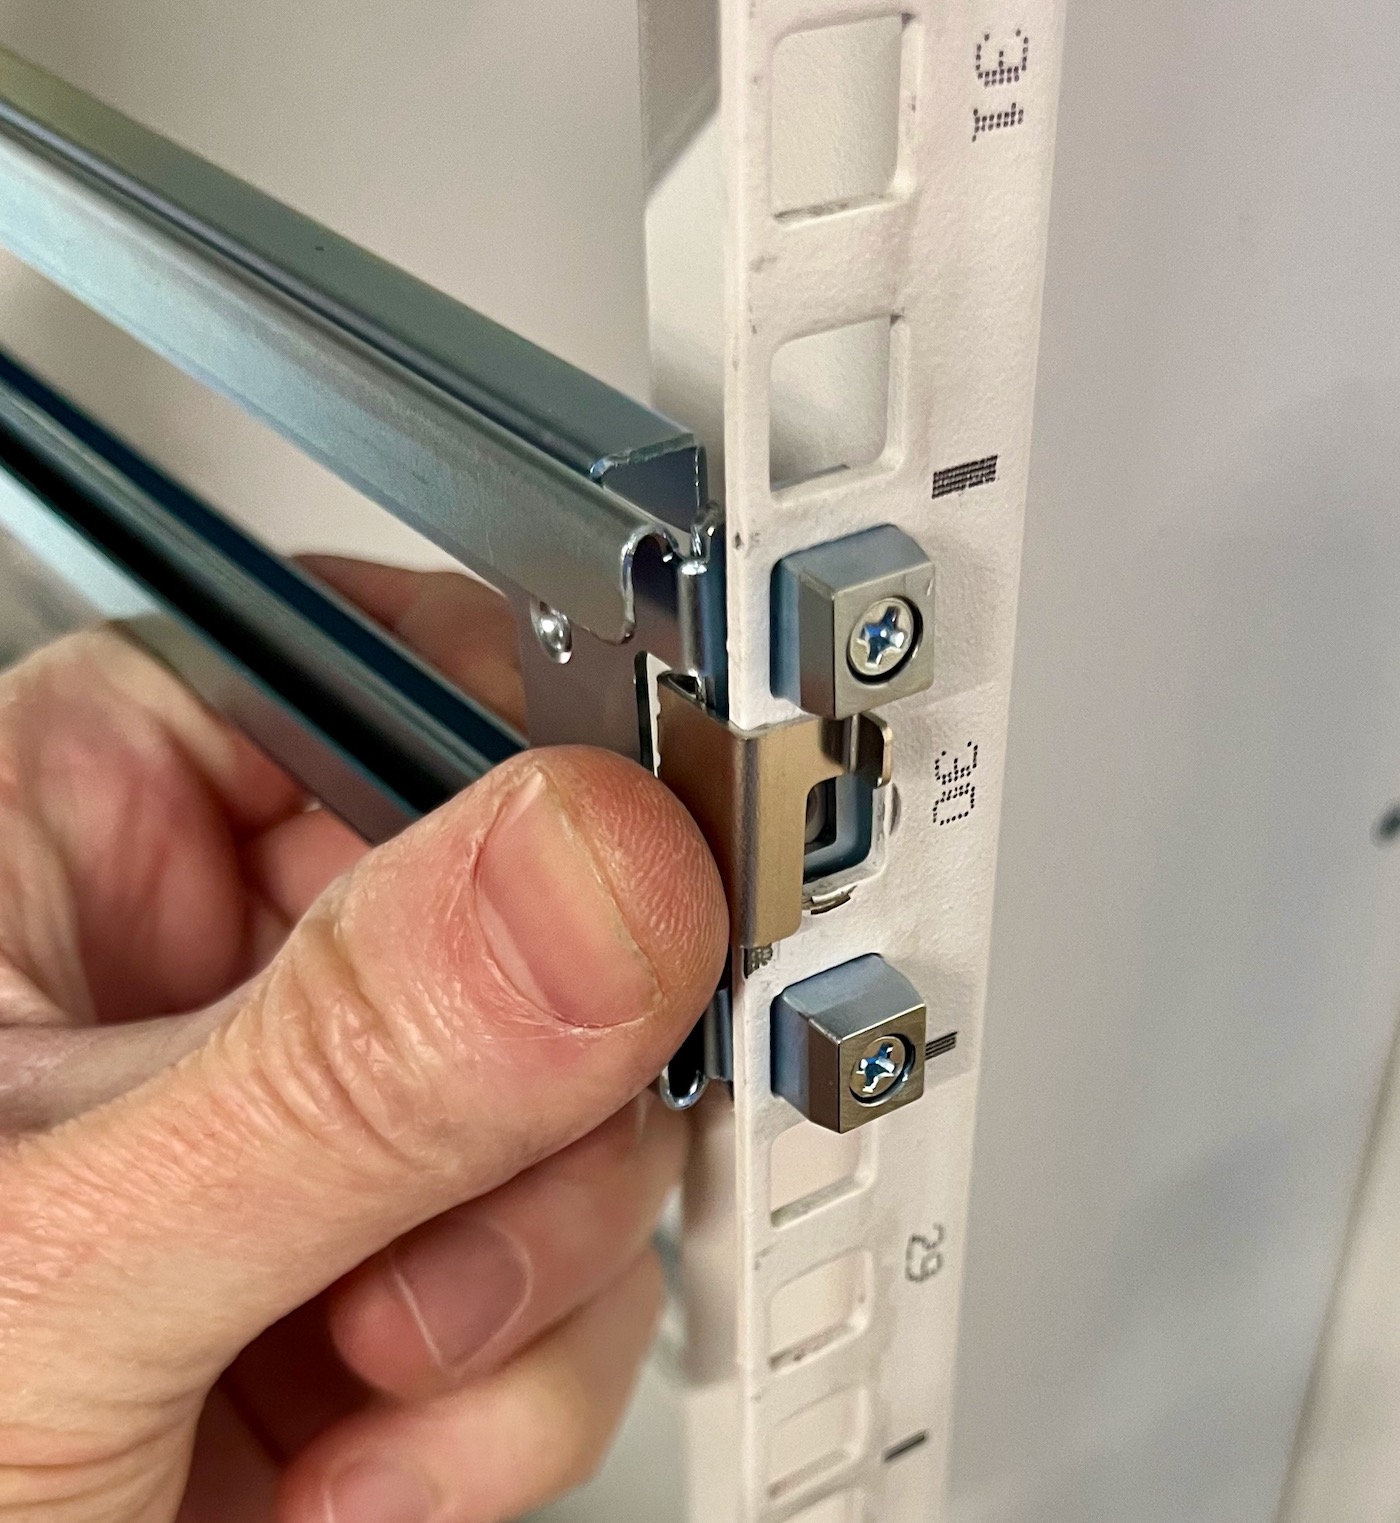
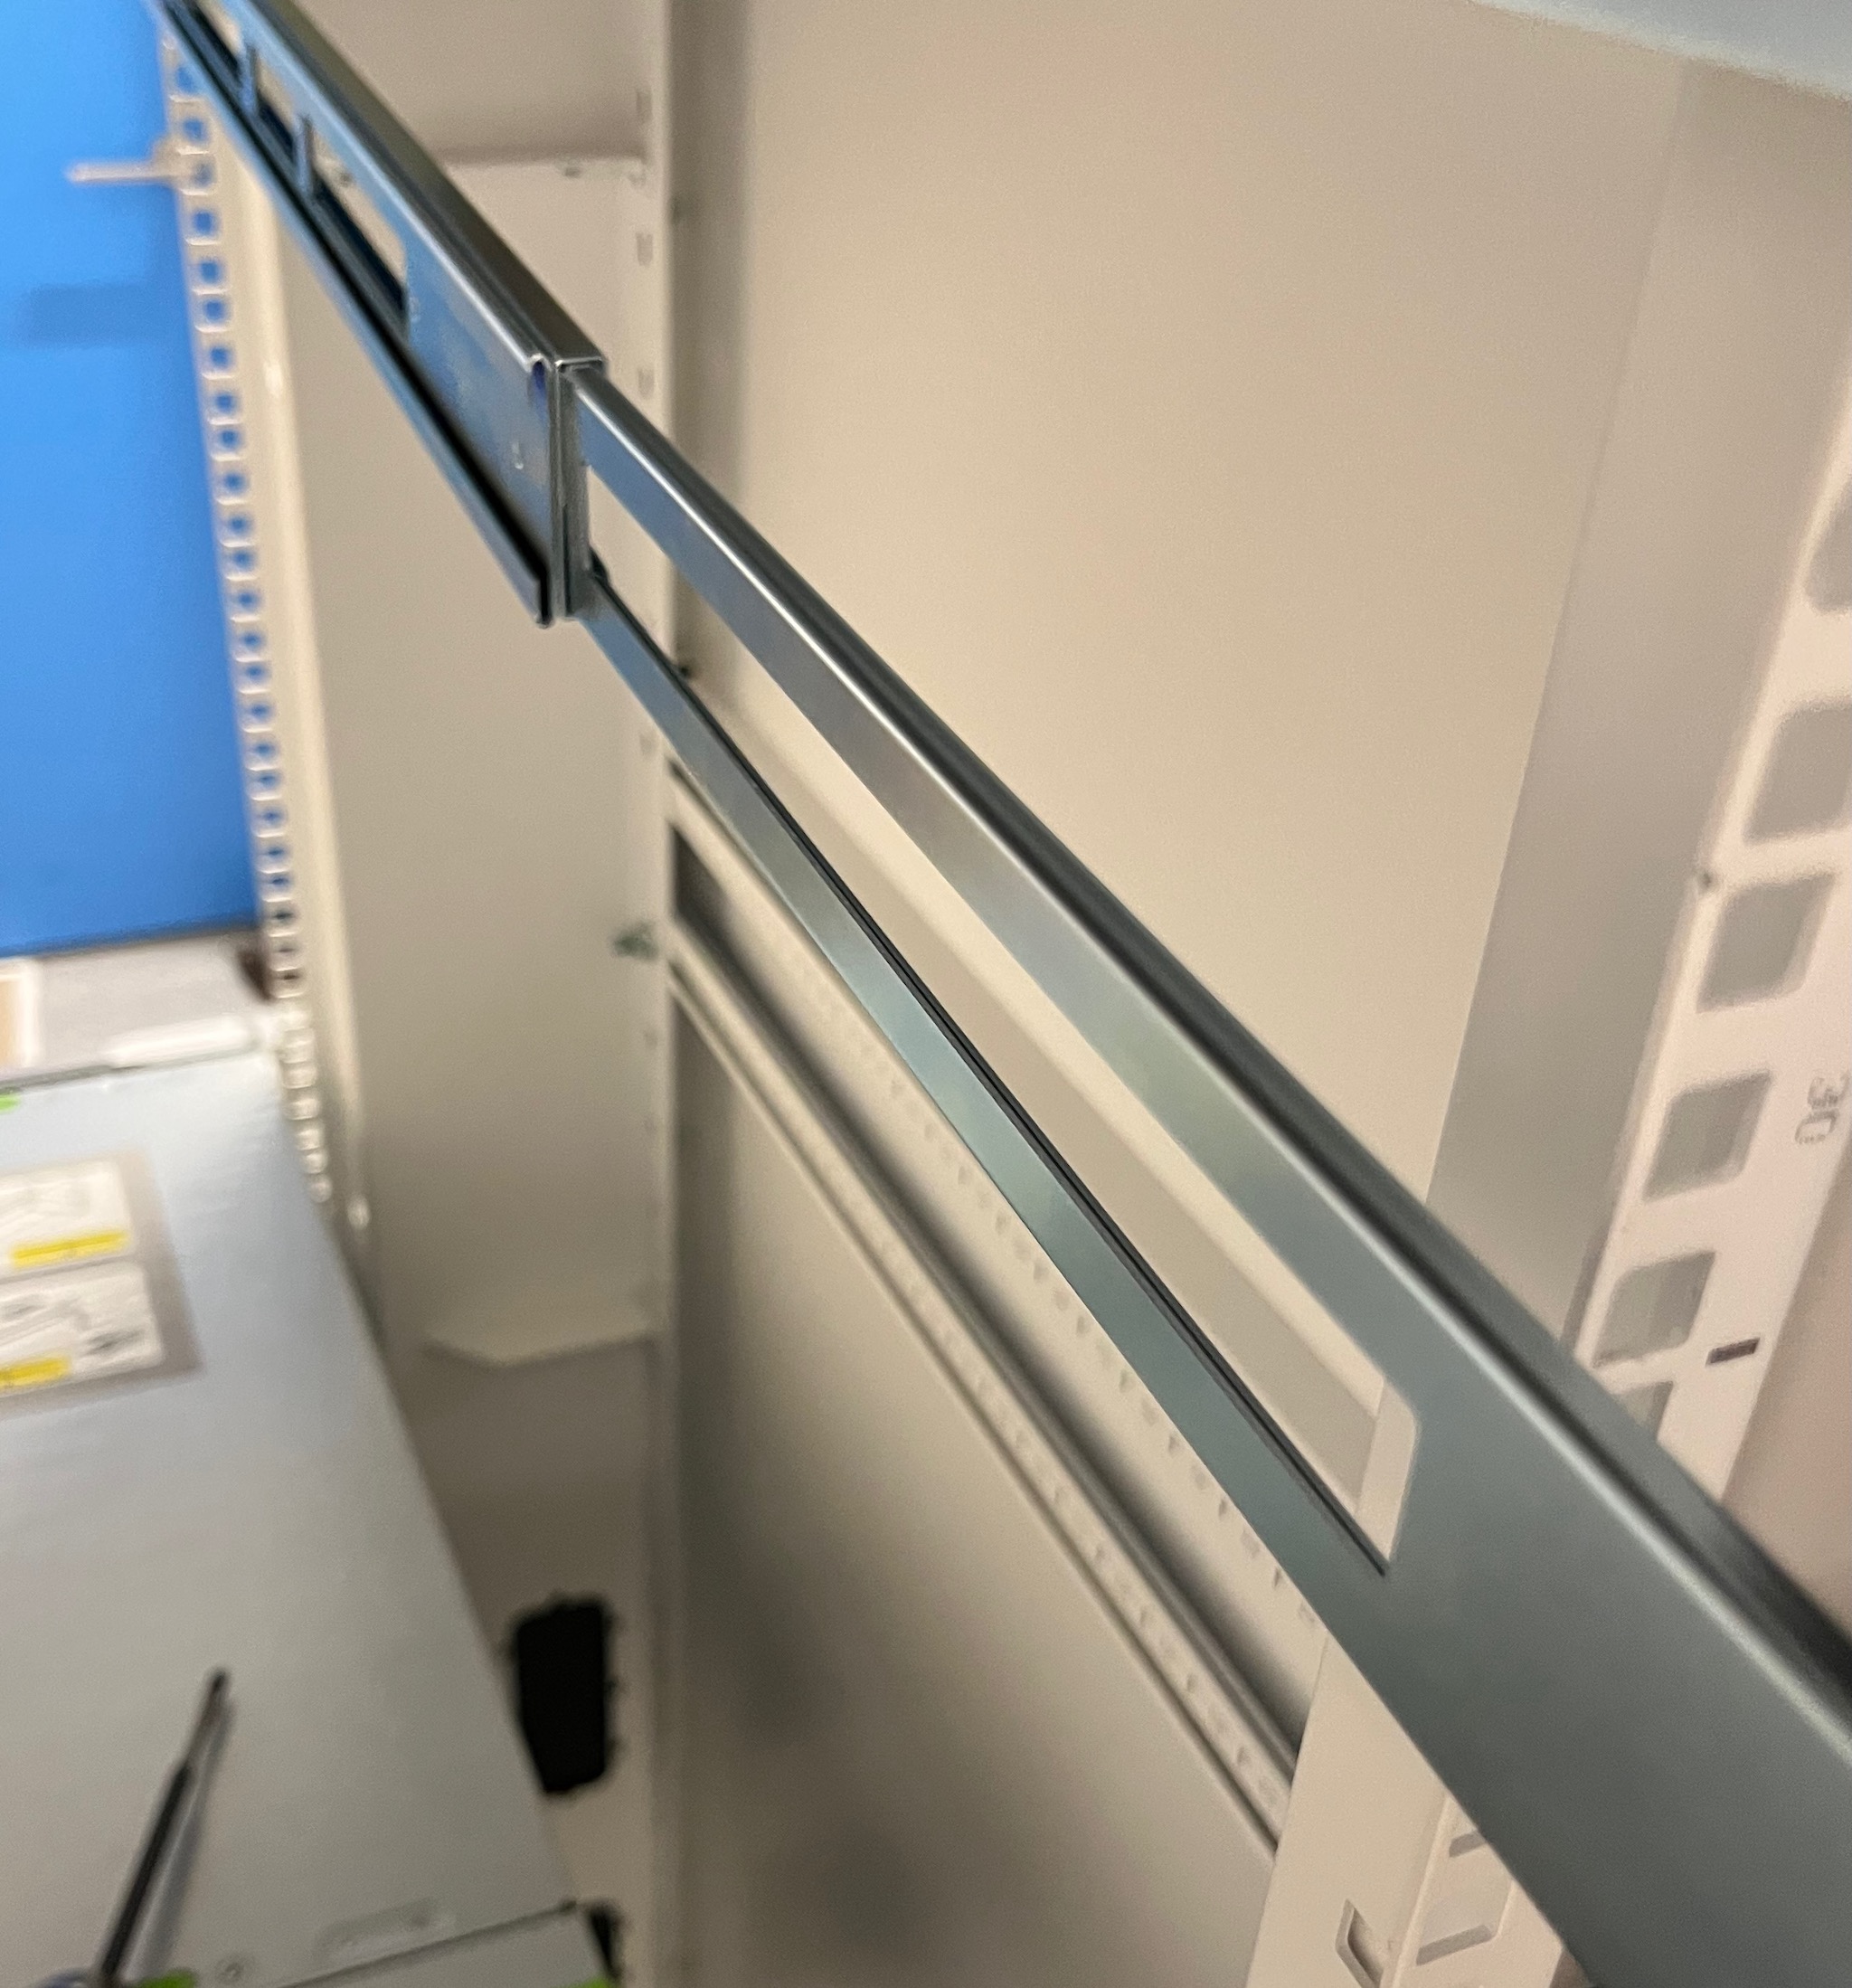
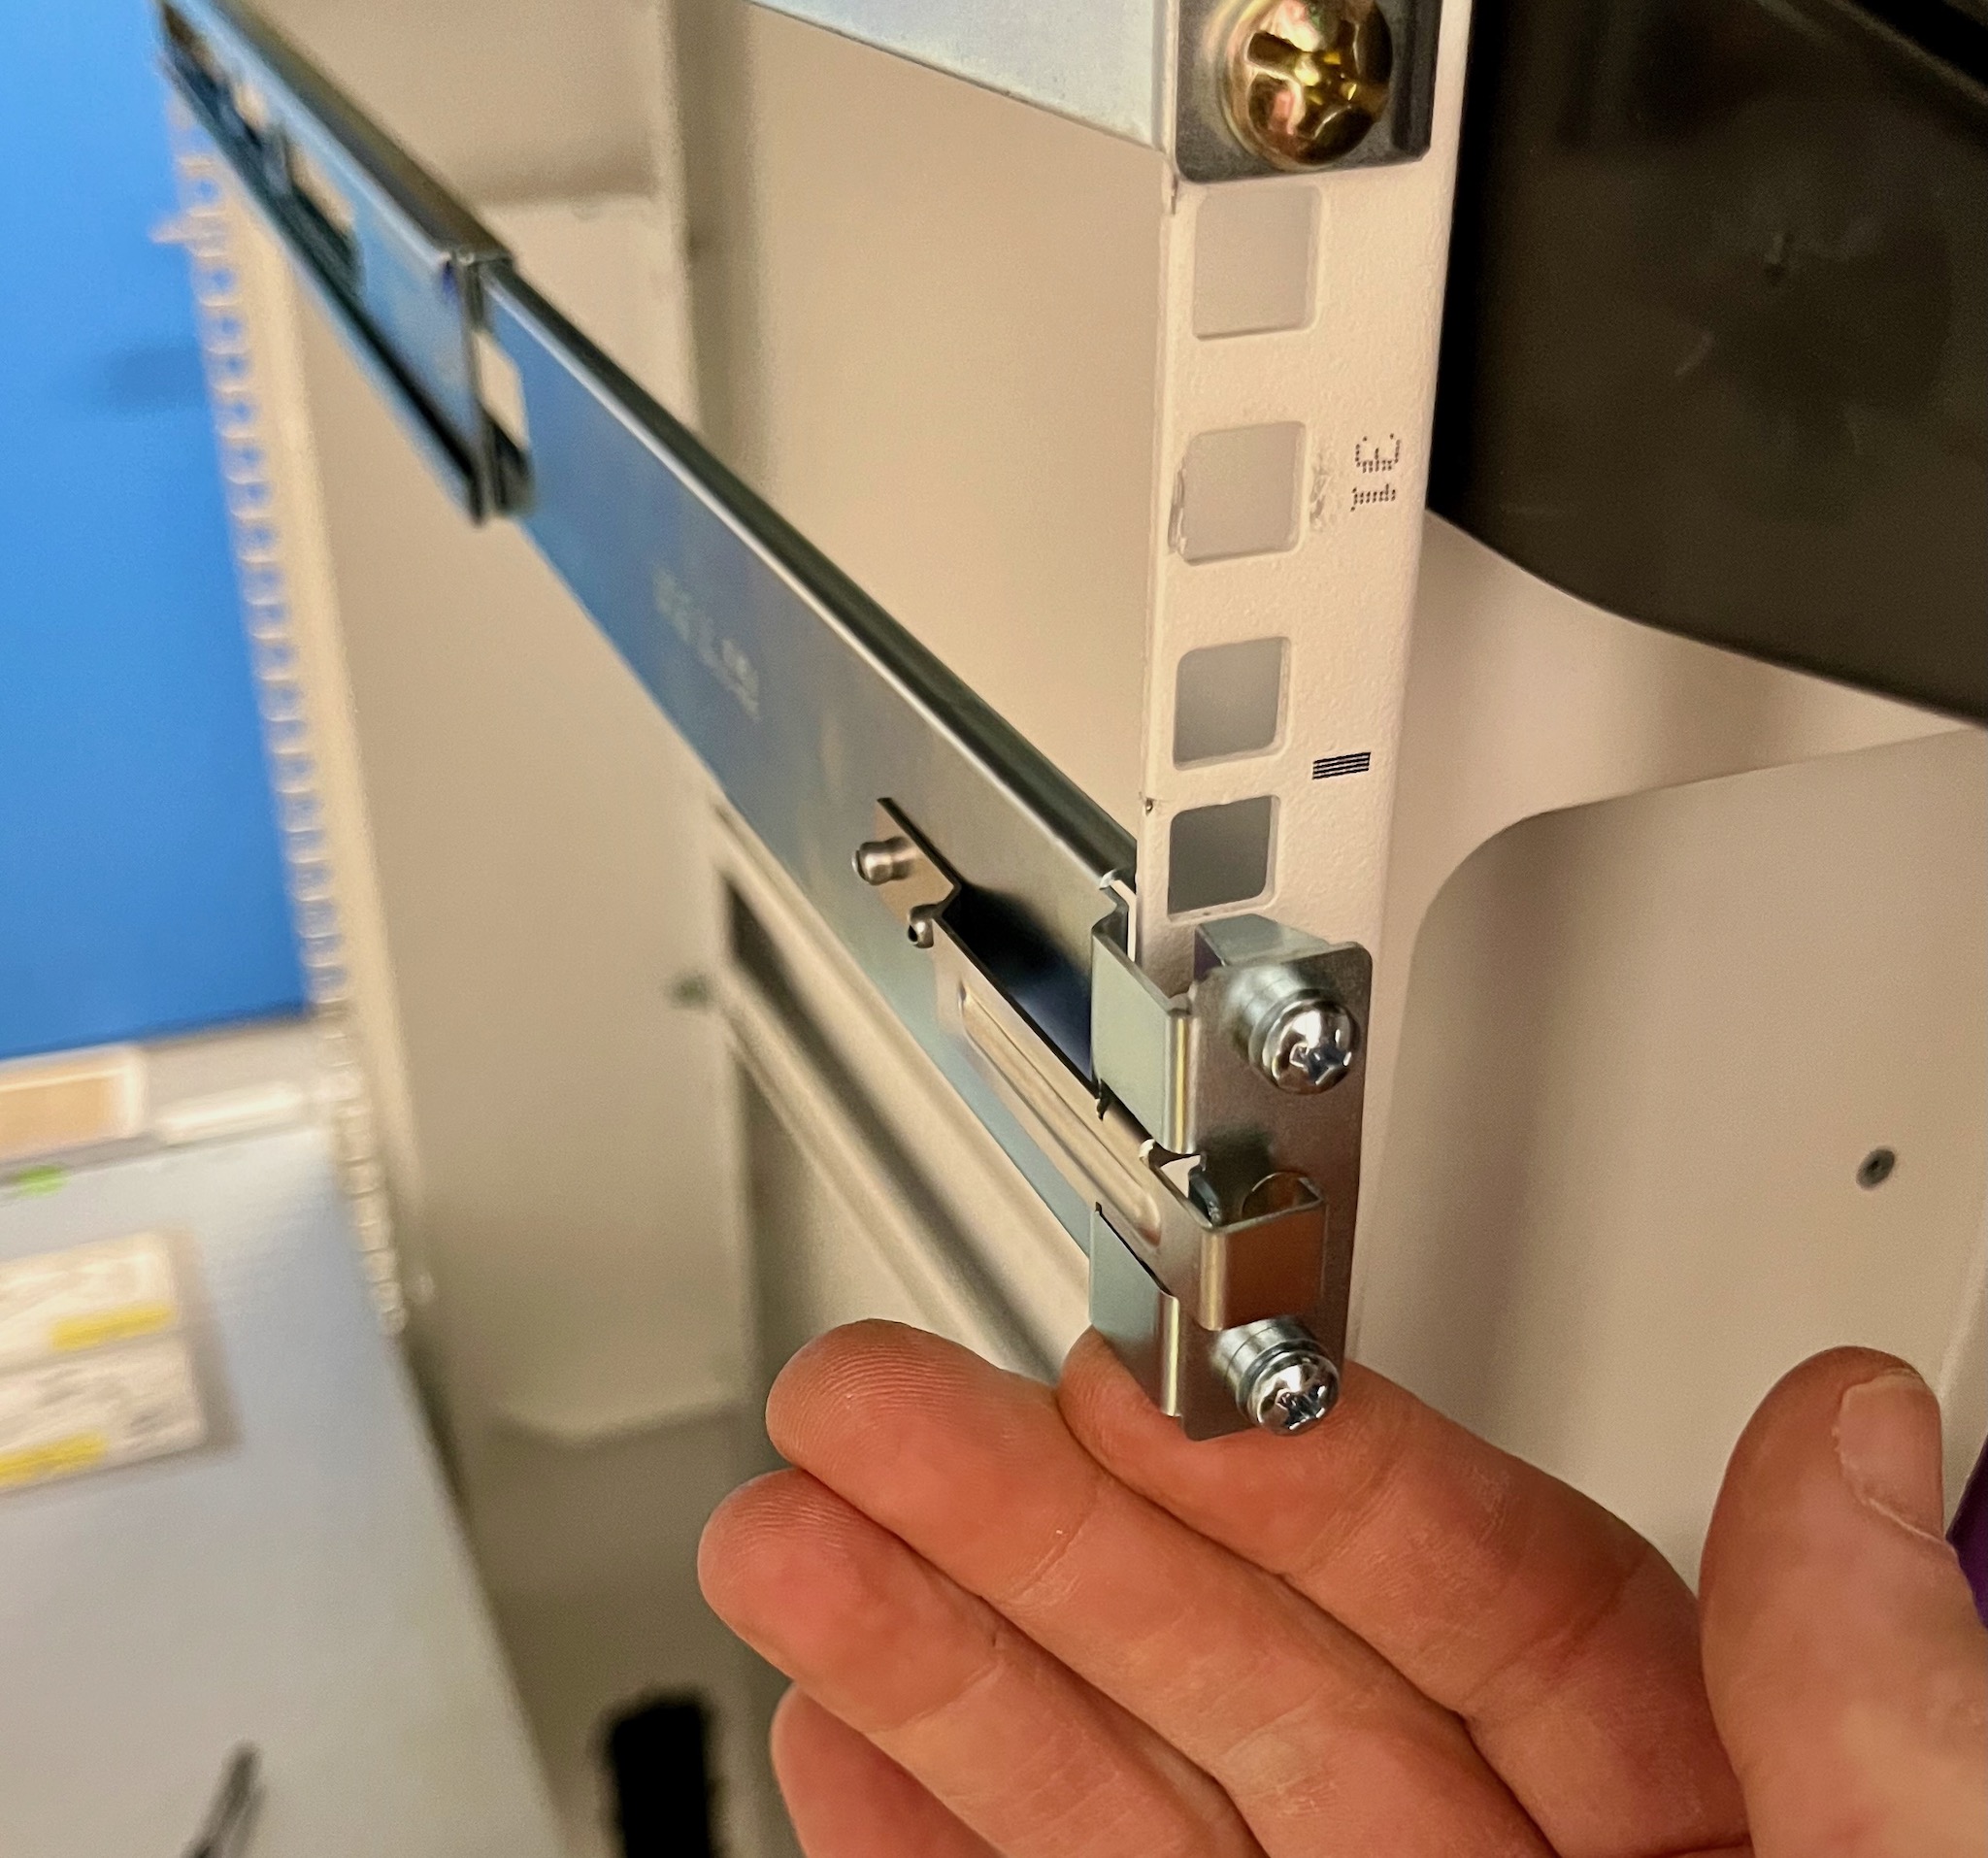
The other front and rear parts attach to the rack with no cage nuts required. The square lugs fit through the hole, and the retainer clip holds it in. The retainer clip design is a little suspect to me, but it is good enough.

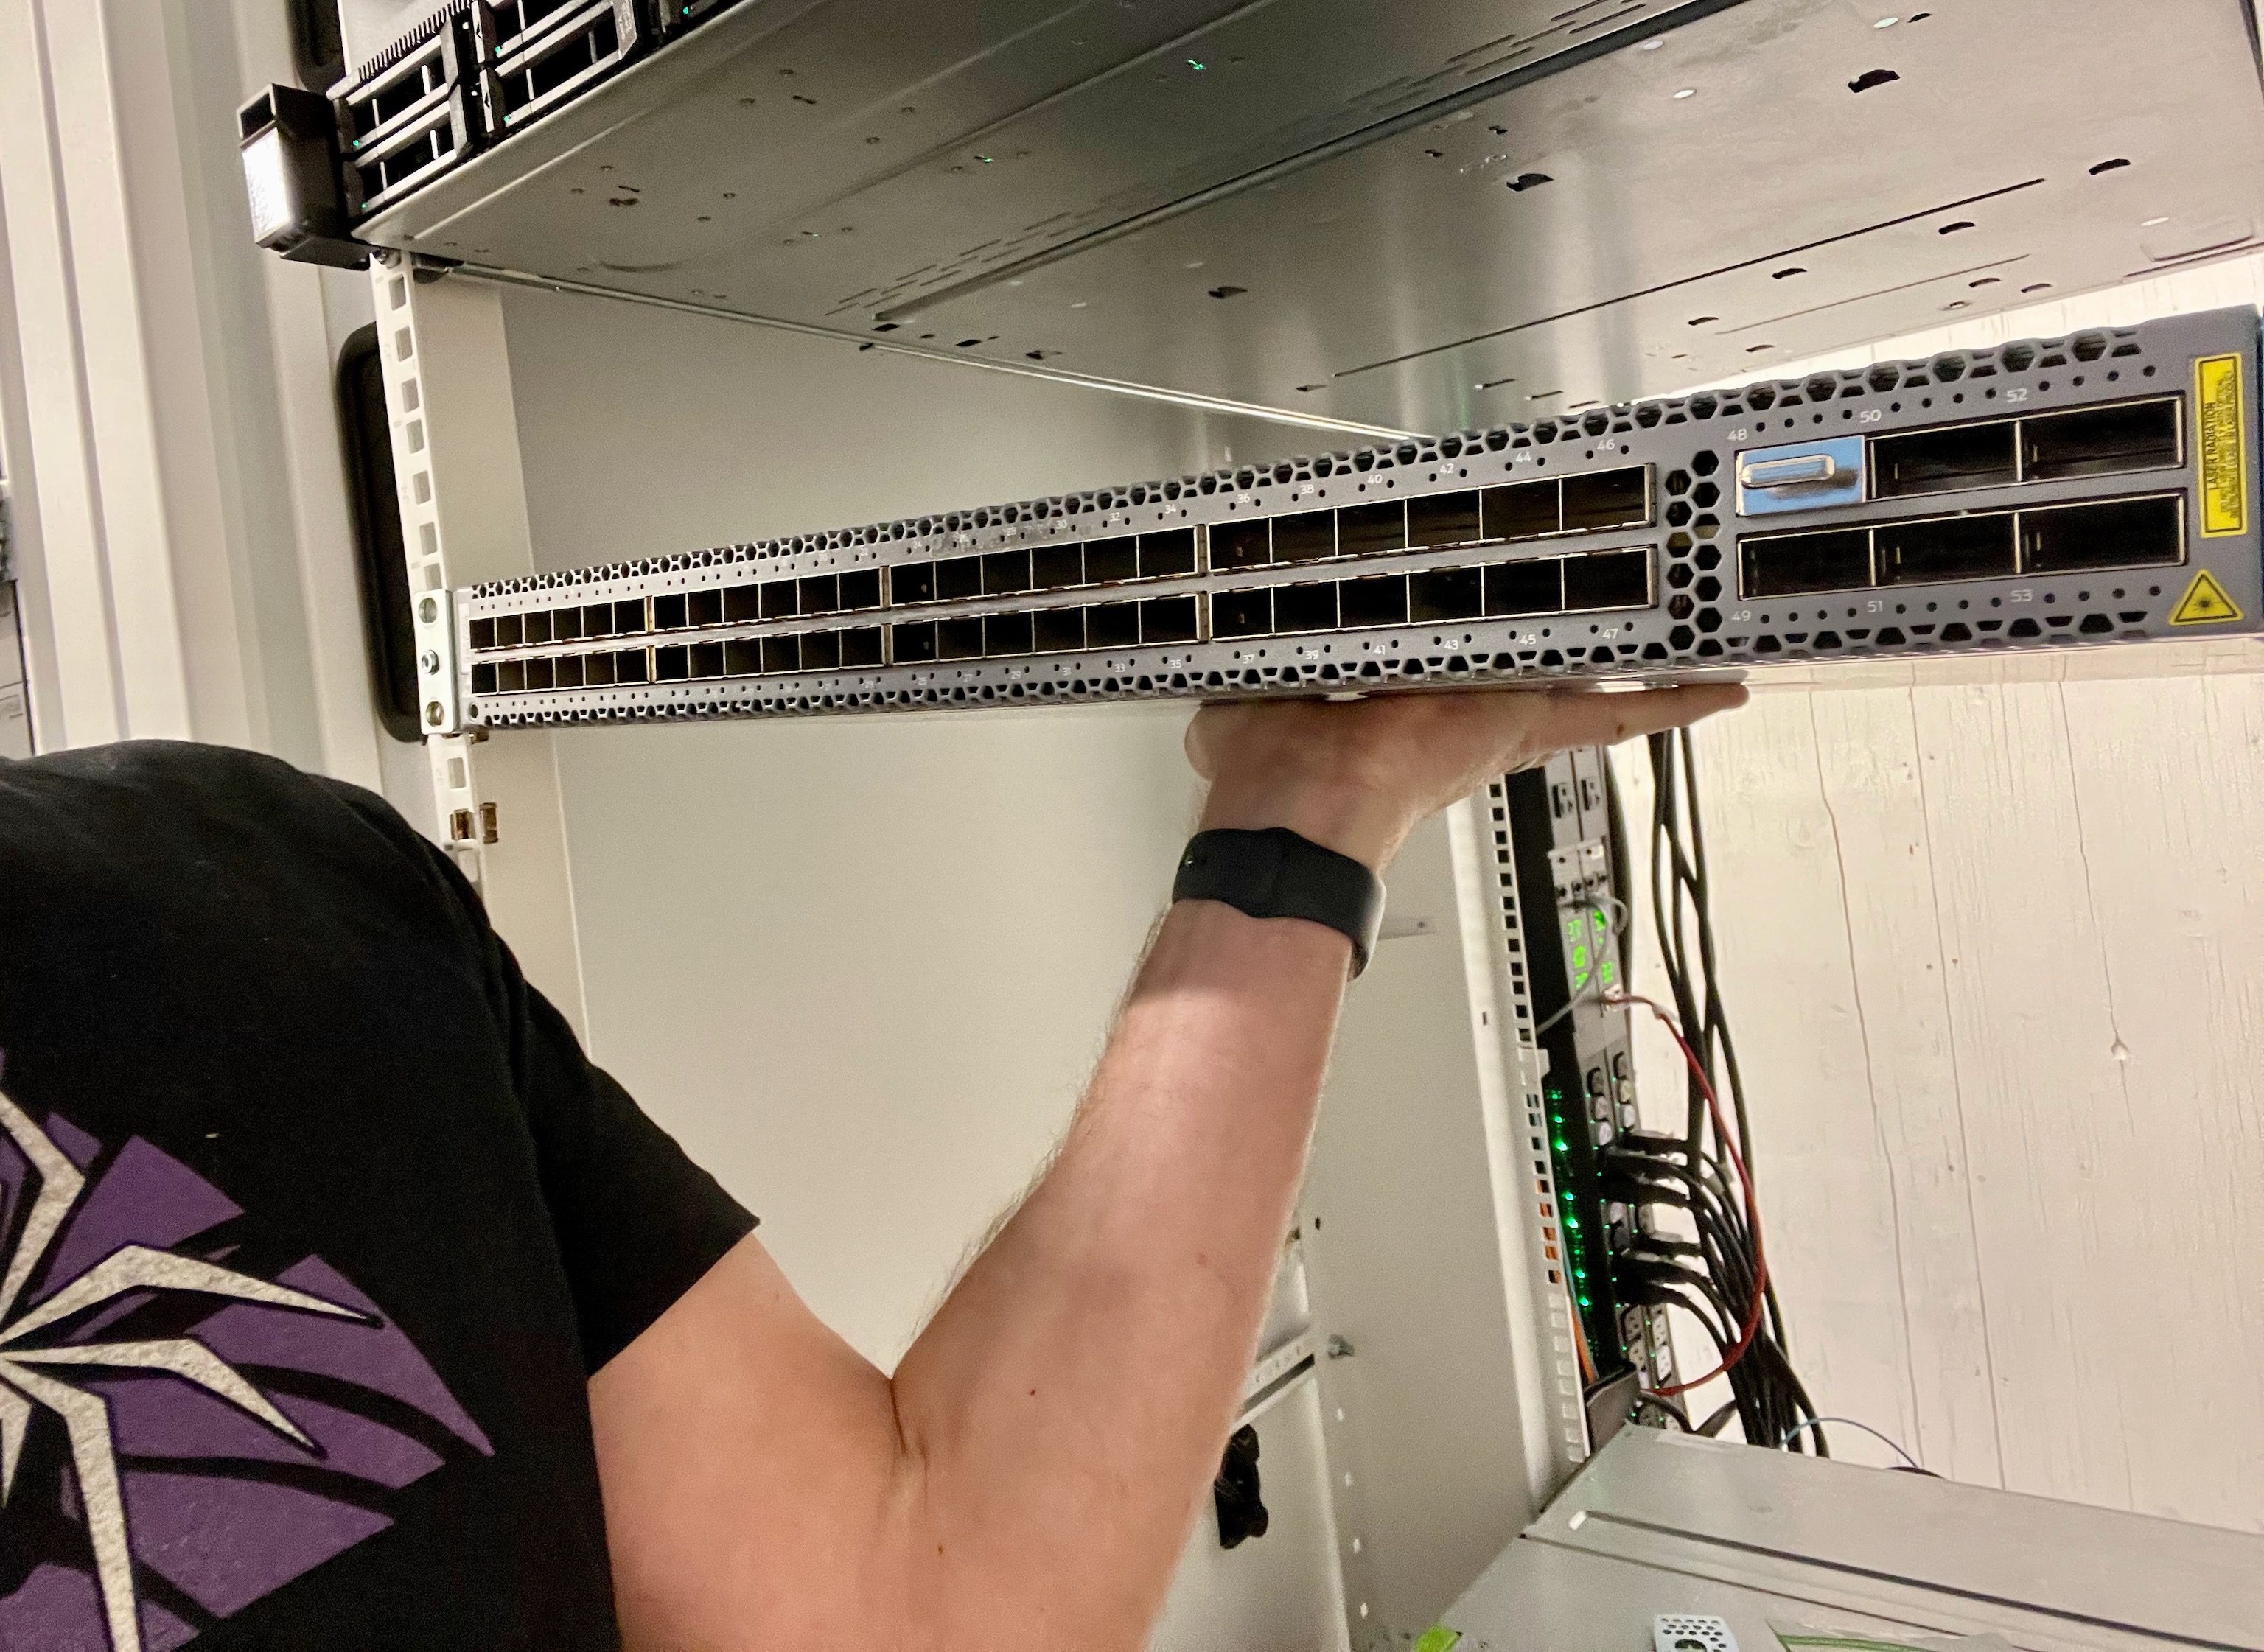
Then slide the switch in, and tighten the thumbscrews. Done! No apprentice needed to hold the heavy switch while you faff about dropping cage nut screws.

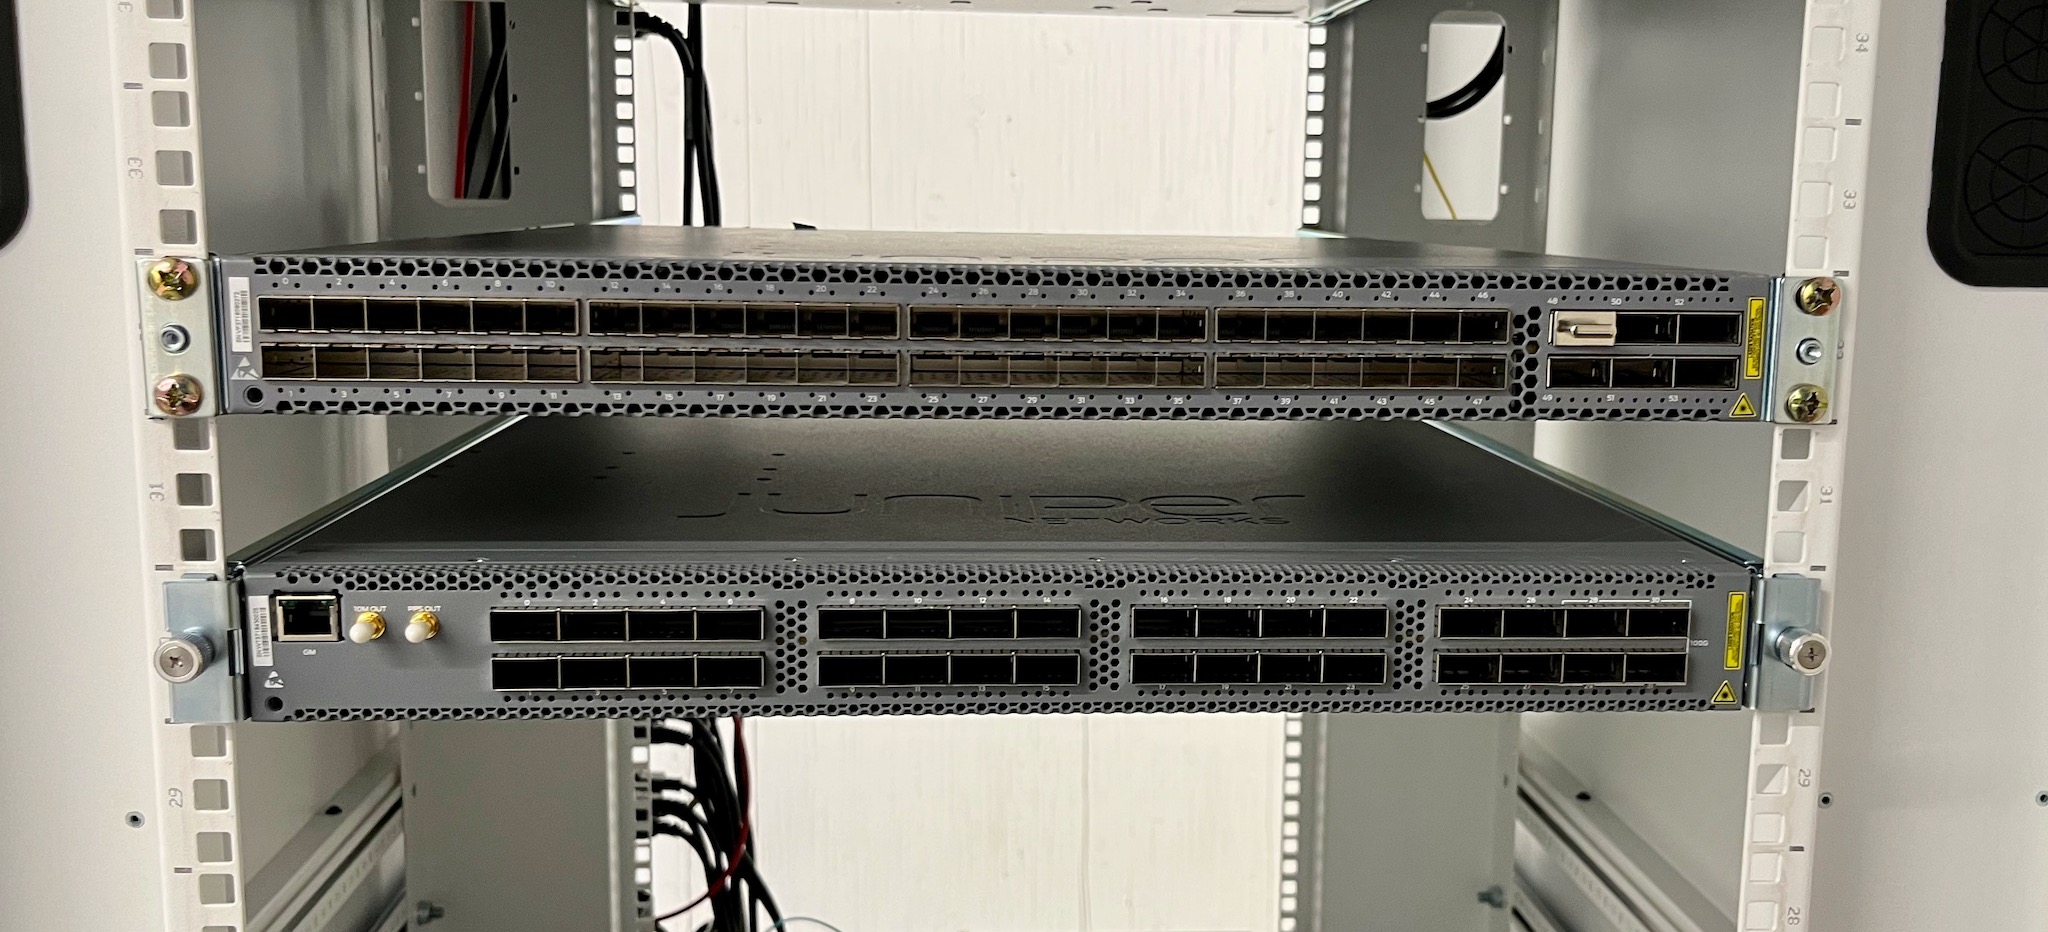
Note there are no catches stopping the switch coming out once you undo the front thumbscrews. Most server rails let you slide the server almost all the way out, then you need to undo a catch to remove them all the way. It’s OK to not have one here, where you are not going to be opening the top of the switch while it’s in the rack.
Verdict
This new system is a real improvement over the old design.
Pros:
- Safe for solo installs
- No cage nuts needed
- Saves time and money
- Should handle higher weight devices better
Cons:
- Still need to put the damn little screws in
- Watch your fingers, the edges are a little sharp
- Need to remember to add to order
I’m glad Juniper has listened to feedback. They were falling behind competitors. This will save me time and money. I plan to order these, and hope they are the default option soon. I’d like to see more improvements with new hardware, offering true tool-less install.
And for the curmudgeons who say I’m wrong, the old ways are the best, I am a poor excuse for an engineer, they will stick to the old ways? Good luck to you. You do that. I’ll move with the times. While you’re faffing around in the DC, I’ll go do something more useful.